Creamy Tuscan Chicken

January heralds the start of all the ‘resolutions’ dreamed up during the long winter nights of the previous year. “Next year will be the year that I…..’ and we start with enthusiasm before the resolutions begin to lose their lustre and fizzle out completely by month’s end!

Well, this year I haven’t made a resolution as such, but I have decided that I must lose weight having been successful a few years ago on my 5:2 regime but noticed it creep up on me again.

And so, it starts with Dry January (mostly to knock a lot of calories on the head in addition to giving the system a rest), some exercise courtesy of my WaterRower but that is just part of the plan. The next bit is to reduce my calories and whilst I will go back on the 5:2 regime I started to think about meals during the non-5:2 days. Ideally, I wanted meals that were filling but not so heavy on the calories if that was at all possible – in fact, I wanted ideas.

To my delight I came across a newspaper article about a recipe book that seemed to fit the bill exactly. The book is Pinch of Nom Quick & Easy: 100 Delicious, Slimming Recipes by Kate Allinson and Kay Featherstone. The book is crammed full of what I call normal meal recipes and not the variety the extols the virtue of only eating salad with salt-free salt!

The other evening I made the creamy Tuscan chicken, and I was so impressed with it. It was full of flavour and very delicious and only 264 calories per portion!

I did make a couple of minor alterations to the recipe out of necessity rather than trying to be ‘clever’.  I had one chicken thigh that needed using up, so I used that along with one chicken breast. Having done so I must admit I thought the thigh much tastier of the two but by using thigh meat you may increase the calorie count by 5 calories or so per 100g if that is important to you.

The second alteration was to do with the tomatoes. I followed the instructions for cooking the tomatoes but stupidly did not reduce the temperature to take into account I was using the fan oven. As a result, the tomato skins were too charred to be useful however I had more cherry tomatoes in reserve.  I added the fresh batch directly to the pan, straight into the simmering stock – fortunately my mistake came to light 10 minutes into the 20 minutes for cooking the chicken so the tomatoes ended up being perfectly cooked in the sauce.    I would, however, recommend you strive to roast the tomatoes as per the recipe because I am sure they will lend a more sun-dried feel and taste to the overall dish.

What you will need for four people:

  • 4 chicken breasts or skinless thighs with any extra fat trimmed off.  Approx 130g in weight
  • 500g cherry tomatoes halved
  • 2 Onions peeled and thinly sliced
  • 4 garlic cloves peeled and crushed/minced
  • 600ml chicken stock
  • 1 tsp dried basil
  • 1 tsp dried oregano
  • 180g reduced fat cream cheese*
  • 80g fresh spinach
  • Low-calorie cooking spray
  • Salt (sea preferably) and freshly ground black pepper

*I used Light Philadelphia which has 40% less fat

What you’ll need to do:

  • Heat the oven to 240c (220c fan-oven) or gas mark 9
  • Line a large baking tray with foil and spray with low-calorie cooking spray
  • Place tomatoes on the tray, cut side up in a single layer.  Spray with low-calorie spray, season with salt and pepper and place in the oven.  Roast for about 20 minutes until wrinkled a little – I recommend checking half-way through.  Once cooked remove from oven and set aside.
  • Whilst the tomatoes are roasting spray a large frying pan with the low-cal cooking spray and gently fry the onion and garlic over a medium heat for about 5 minutes until they have softened a little.
  • Add the chicken, the stock, basil and oregano to the pan and cook over a medium heat for 10 minutes then turn over the chicken, place a lid on the pan, and cook for a further 10 minutes until the chicken is cooked through thoroughly.
  • Remove the pan from the heat and stir in the cream cheese until melted and combined to make a creamy sauce.  If you think the sauce is a little too thick then increase the heat until it gets to the consistency you prefer.  If it is too thick, simply add a little water to thin it.
  • Stir the spinach into the sauce until it wilts a little and then stir in the roasted tomatoes.  Et voilà – ready to serve!

This dish may be accompanied by steamed green vegetables (38 kcal per 80 g) or pasta such as tagliatelle (174 kcal per 100g cooked).

Footnote:  I did notice that when the sauce cooled it separated a little but all you need do is to stir it again and it will emulsify once more – useful to know if you plan to freeze portions as I expect the sauce will separate once it has defrosted.



Hansi Ashton’s Spring Greens

4039472C-8C80-4F02-80D3-761C8096EC60_1_201_a

This week’s post isn’t a recipe as such but rather a method for preparing and cooking spring greens favoured by my mother, Hansi.

When my sisters and I were growing up in the ’60s the standard British method for cooking cabbage was pretty much to dump it in boiling salted water and cook it over a medium heat for about a week to ensure that all colour, texture and taste was boiled out of it.  The resulting pap would then be drained (what nutrients left in the cooking water being poured down the sink) and dumped on a plate accompanied, probably, by similarly over-cooked carrots, lumpy mashed potatoes and a piece of grey looking meat in thin gravy.

Fortunately for my sisters and me and our father our mother came from Austria which meant the food that she prepared for us was a balance of British and continental cooking and was always superb.  And when it came to the British side of things, our mother had her own methods which included how to cook spring greens that was tasty and reasonably quick.

I mentioned to my sister Maria that I was going to post this at some stage but the resulting wave of nostalgic texts about mother’s spring greens between Maria and my other sister, Caroline, and my niece Natalie  has meant that it has leap-frogged the post I had planned to publish this weekend.

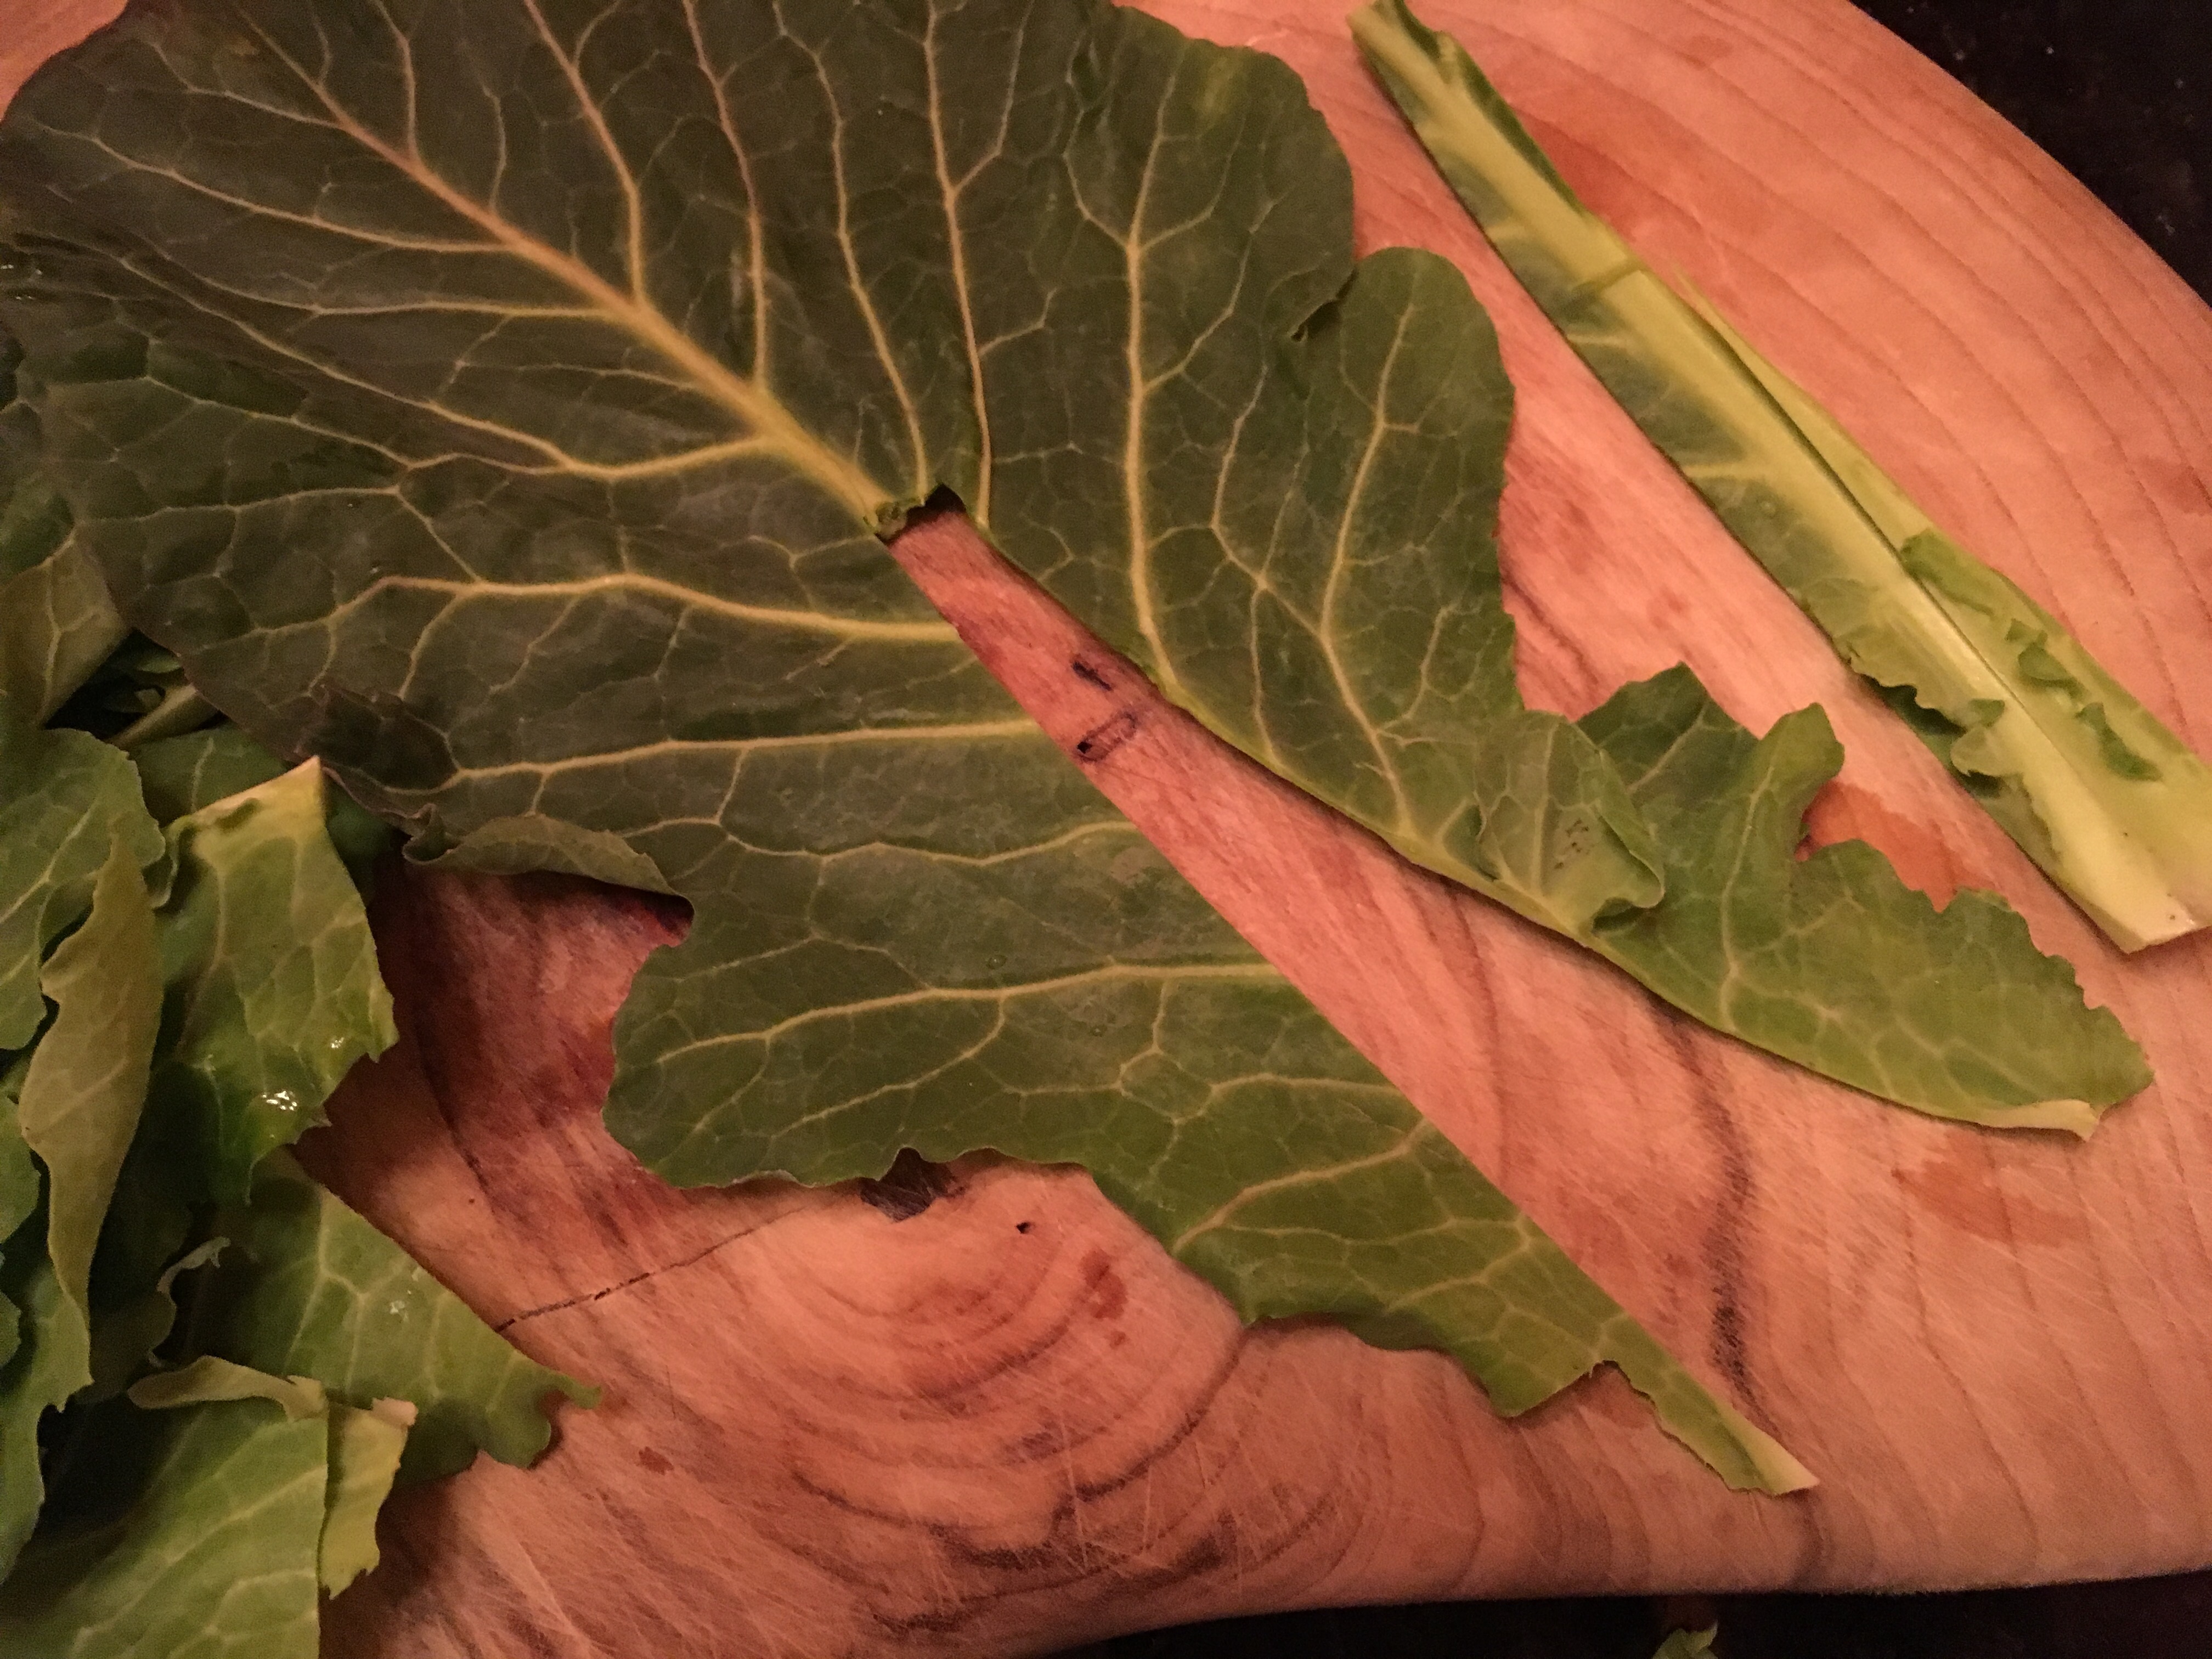
What did come out of the cyber-chatter was that Maria can’t get spring greens easily, if at all, in Australia and Caroline and Natalie in America aren’t too sure if they can get it either.  But not to worry, this method can be adapted for other long-leafed members of the cabbage family such as Cavolo Nero.  At a pinch you could try kale, but I think the crinkly leaves of kale might be a problem when shredding the leaves.

The ingredients for this are very few, just four!

What you’ll need for two people is:

  • 500gr/1lb Spring Greens.  (Catering for more people? Then simply increase the amount of spring greens by 250gr per person)
  • Butter
  • Salt
  • Pepper

What you ‘ll need to do:

  • Separate the leaves from the main root.  There is no need to wash the leaves beforehand because you’ll be giving them a good wash at the end.
  • With a sharp knife, cut out the central vein of each leaf leaving a V shape cut in each leaf making sure you do not cut the leaf in half.

EAEBD773-043B-4B8F-BD3D-2D609BEAAF7D_1_201_a

    • Stack the leaves on top of each other – the largest at the bottom then building up.
    • Roll the leaves tightly as if making a cigar.
  • A119281E-DFB3-4CC4-8AA3-D25F5B262245_1_201_a
    • Using your sharp knife cut the ‘cigar’ into fine ribbons holding the roll firmly in your other hand as you cut – do not let the leaves relax otherwise they will unroll, and you’ll have to start again.
    • Fill your sink with cold water and place the ribbons in a large colander and dunk the lot into the sink.  Swish the greens around to wash.

51490C2E-1BD2-4D8C-87BB-C103FF92935F_1_201_a

  • Lift out the colander and let the excess water drain off but do not shake off the residual water from the ribbons – this will be your steaming liquid.
  • Transfer the greens to a large saucepan and place on a high heat until you hear the water begin to hiss and sizzle.  Immediately put the lid on the saucepan and reduce the heat to low to medium and allow the greens to steam for about 10 to 15 minutes depending on how much you have prepared.  Check to see if the greens are tender if not steam a little longer.  Make sure you do not over-cook as the ribbons should be vibrant green and hold their shape.
  • Once cooked add butter and salt and pepper to taste and stir through but do not drain the liquid.  When you are ready to put the greens into a serving dish use kitchen tongs to squeeze out the liquid beforehand.

If you are going to use another type of leaf cabbage, such as Cavalo Nero you may need to reduce the cooking time a little because Cavolo Nero leaves are more tender that spring green leaves and may not require the same amount of time steaming.

STOP PRESS: Since posting this yesterday my sister Maria has written to tell me she made the dish this evening (Sydney time) using Cavolo Nero and cooked it for 10 minutes precisely – the timing being spot-on.

Top Tip: It is very important that you keep your knives sharp – sharpen them at regular intervals.  Hansi detested a blunt knife and if she came across one (never her own naturally) she would declare “Vell, it was so blunt you could ride to Rome on it”

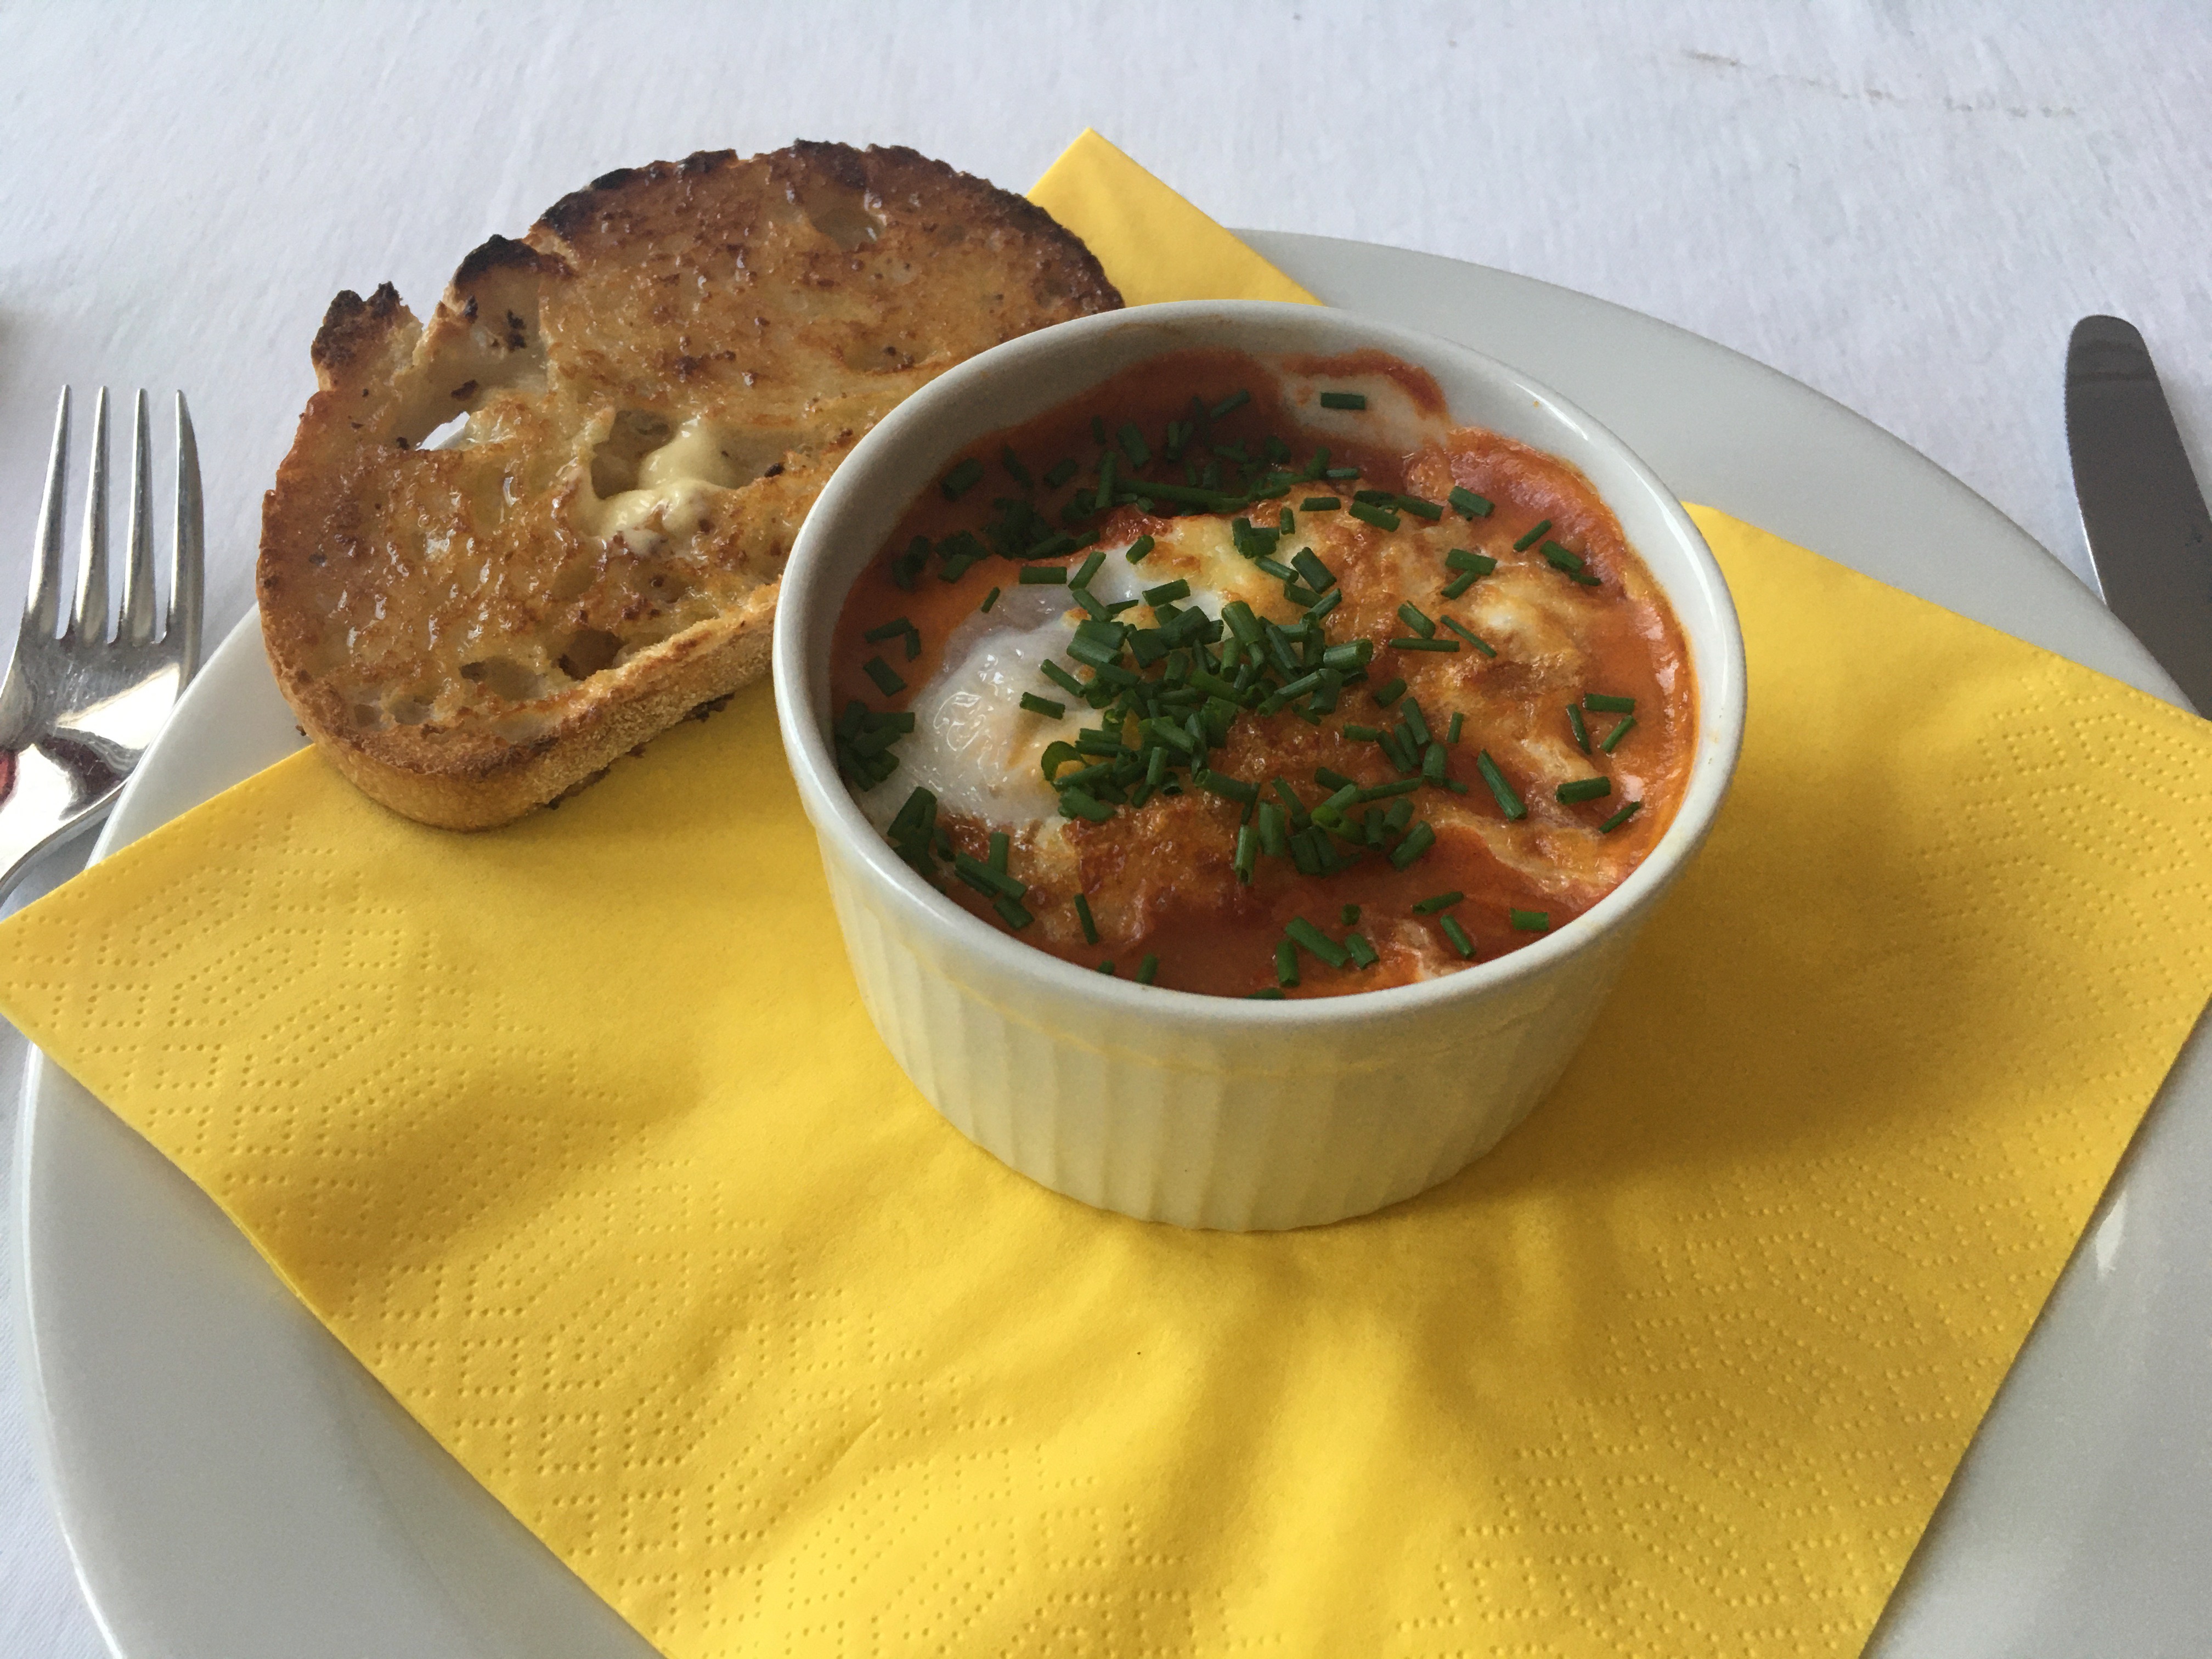
Breakfast eggs and baked beans

Egg & baked beans

I was thinking what to have for breakfast on a Sunday morning a week or so ago and thought I would like something a little different from kippers and scrambled eggs (not that I bought any kippers that weekend) or an omelette or any of the other usual breakfast dishes so I did a little research and came across this recipe published online by Rika Livingstone in Posh Journal.

What struck me was the simplicity of the recipe, not least because I had all the ingredients and there are only four of them – baked beans, egg, grated cheddar cheese, and hot sauce.  There is a fifth, optional, ingredient if you have it to hand – chives.

The addition of hot sauce in this dish makes it a slimmed down version of Huevos rancheros and the fact I have chosen a quasi-Mexican dish will come as a complete surprise especially to my friends Michelle and Joe and their daughters Olivia and Sophia who know all too well my trenchant views on Mexican food!  I have never been a fan of Mexican cooking and developed my robust opinion after walking through a Mexican market in San Antonio, Texas, decades ago, where most of the food being cooked seemed to be nothing but chicken gizzards and other unmentionable and inedible parts of the bird.  Having so said, I have modified my view slightly after nephew-in-law Paul introduced what seemed to me at least, a more modern approach to Mexican food when he managed a branch of Chiladas in Plano, Texas.

The sauce that Ms Livingstone mentions in her recipe is Louisiana Hot Sauce.  I am not sure if this brand is readily available here in the UK but by good fortune and after a rummage in my kitchen cupboard I came across a bottle of Alvin’s Hot Sauce which was given to me by Natalie and Paul after their return from a holiday in Trinidad and it is this sauce I used.

Whereas Louisiana Hot Sauce is made with cayenne peppers (and made in Louisiana USA) Alvin’s Hot Sauce is made with “Fresh Scotch Bonnet Peppers” as the label proudly states – along with the fact that it is Island made in Trinidad and Tobago.

However don’t despair if you can’t get hold of either brands mentioned above because one that is readily available, at least in Waitrose, is the Encona brand West Indian Original Hot Pepper Sauce.  If you are fussy about what type of peppers are used in your hot sauce Encona uses Scotch Bonnet peppers and Habanero peppers!  And if you wish to make your beans and egg more exotic you could use Sriracha Hot Chilli Sauce from Thailand which is made with birds-eye/Thai chillies

IMG_3941

What you’ll need for one, two, three, four or more people is:

  • Heinz baked beans – 200gr/7oz per person
  • 1 egg per person
  • Hot sauce to taste
  • 40gr/1.5oz grated cheese per person
  • Chopped chives – optional

What you’ll need to do:

  • Heat the oven to 180C/350F.
  • Divide baked beans between individual oven-proof dishes  (I used a 10cm/4″ ramekin dish for one person).
  • Stir in an amount of hot sauce into the beans.  NB add sparingly at first and check before adding more if required.
  • Add grated cheese on top of the beans.
  • Add egg to the centre of each dish and finish off by adding a little more cheese over the egg.
  • Place dishes on a baking tray and cook in the oven for about 12 to 15 minutes depending on how you like your eggs – softer or more set.
  • Remove from oven and sprinkle with fresh chopped chives and serve with toasted bread on the side if you wish.


Pizza Toast

Pizza Toast

This recipe was given to me by my Austrian cousin, Greti, who made this dish one evening when she and her husband Jos invited me and my sister Caroline, my niece Natalie, and our cousin Philipp and our Tante Dorli  for a quiet evening following a large family gathering a day or so before.

This simple yet delicious recipe is ideal when you want something tasty to eat of an evening without having to make elaborate preparations and it is also ideal for serving, in smaller pieces, as nibbles to go with pre-dinner drinks.

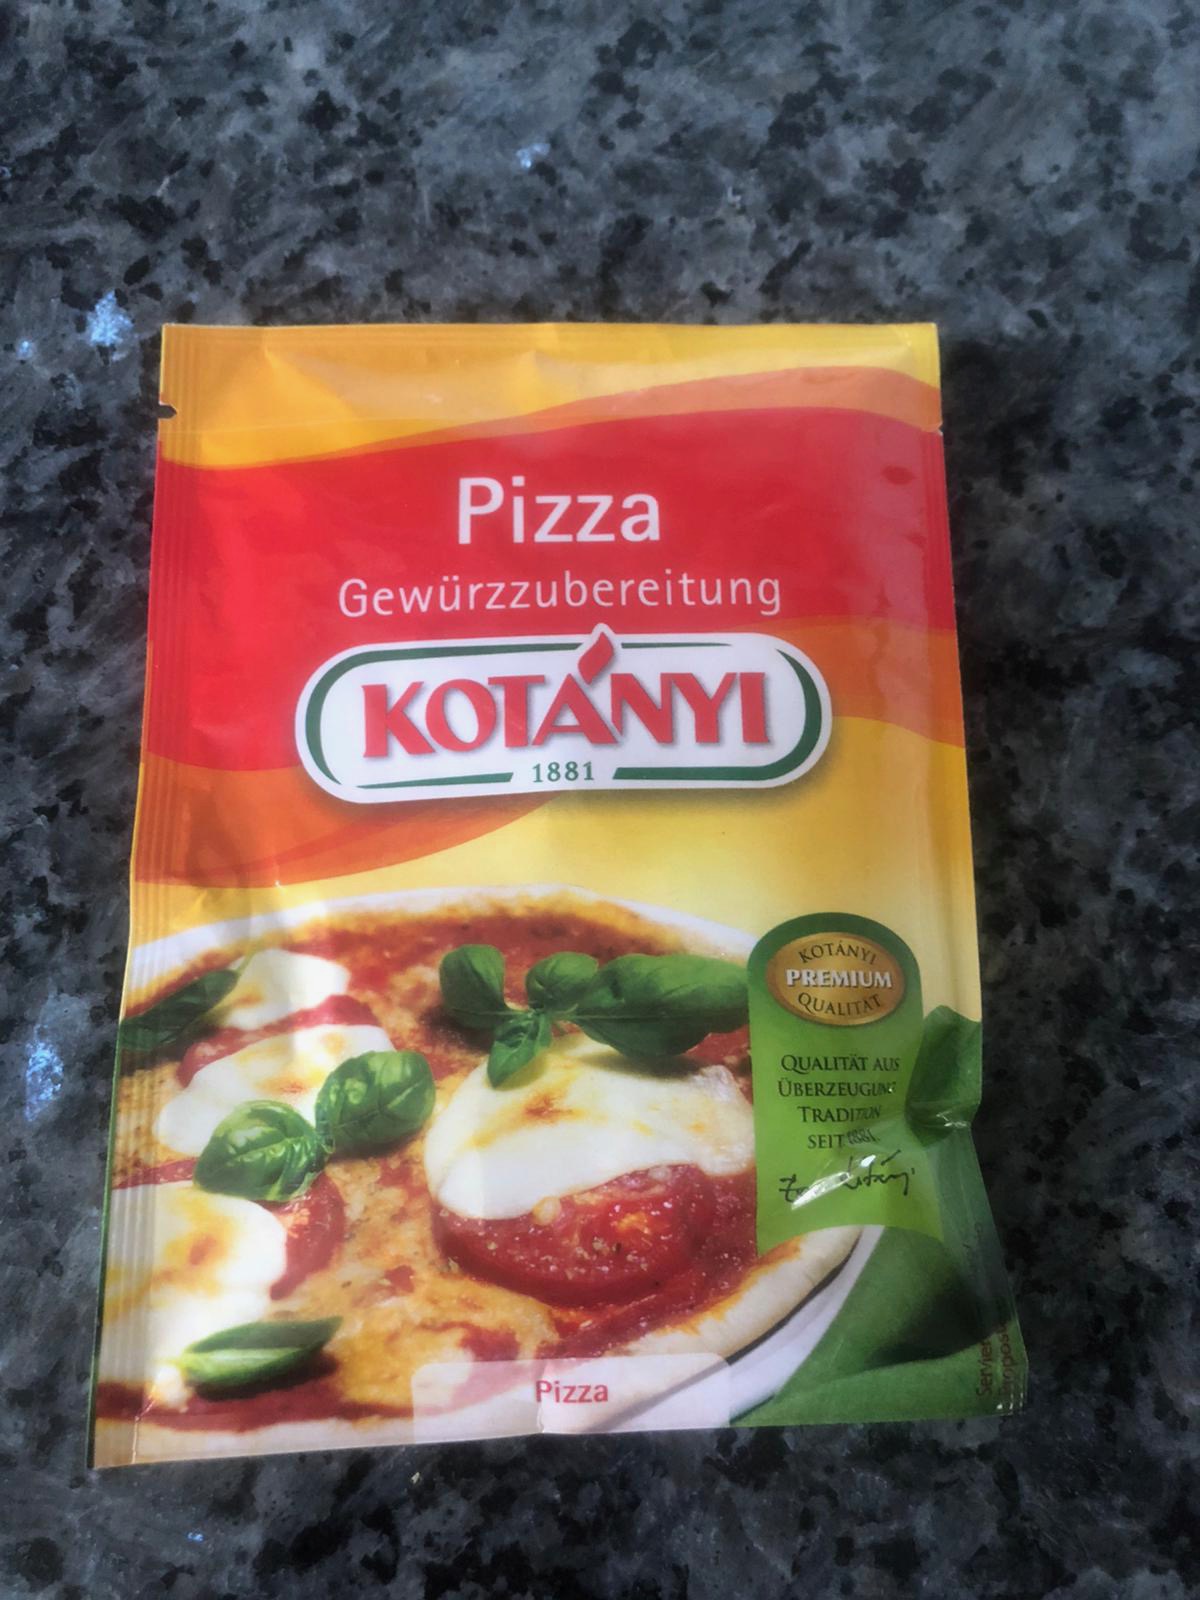
One of the ingredients is Pizza Gewürtzzubereitung (translated as Pizza Spice Preparation) which you can buy in supermarkets in Austria – the brand I have is made by Kotányi, a very good Hungarian company (excellent paprika too but that’s another recipe) however don’t fret if you can’t get hold of it because Italian Seasoning will work as well, or, better still, make your own – I shall give you the recipe for that below.

Pizza Gewürtz

As for the bread it is best to use white sliced bread (whoever heard of a wholemeal pizza?) such as Mother’s Pride (if it still exists) aka Pain Anglais in France.  I did experiment with sourdough bread the other evening (which is featured in the photograph above) but I was disappointed with the result and therefore would recommend you stick with white sliced bread.  Oh yes, the pizza toast did not fare well cold the following morning so make sure you enjoy it hot once it comes out of the oven.

It’s a little difficult to judge the quantities required because it will  depend on how many people you will be catering for and whether you’ll be making the pizza toast as a snack, or as nibbles to go with drinks or making more of a meal of it.  When we were at Greti’s there were seven of us and Greti kept up a constant stream of the pizza toast.  Perhaps think along the lines of 2 slices of bread per person to go with the quantity of crème fraîche, cheese and ham below and increase the quantities of all ingredients if you are catering for more guests or very hungry guests.

If you wish to adapt the recipe for vegetarians, simply leave out the ham.

What you’ll need for three to four people is:

  • Sliced white bread – about 8 slices
  • Pizza/Italian seasoning (see ‘recipe’ below)
  • Crème Fraîche (250ml tub /approx 9 oz)
  • A little double cream (heavy cream) for binding
  • Pack of grated mozzarella (240gr/8.5oz)
  • 1 pack of cooked ham shredded or cut into small pieces

What you’ll need to do:

  • Heat the oven to 180C/350F.
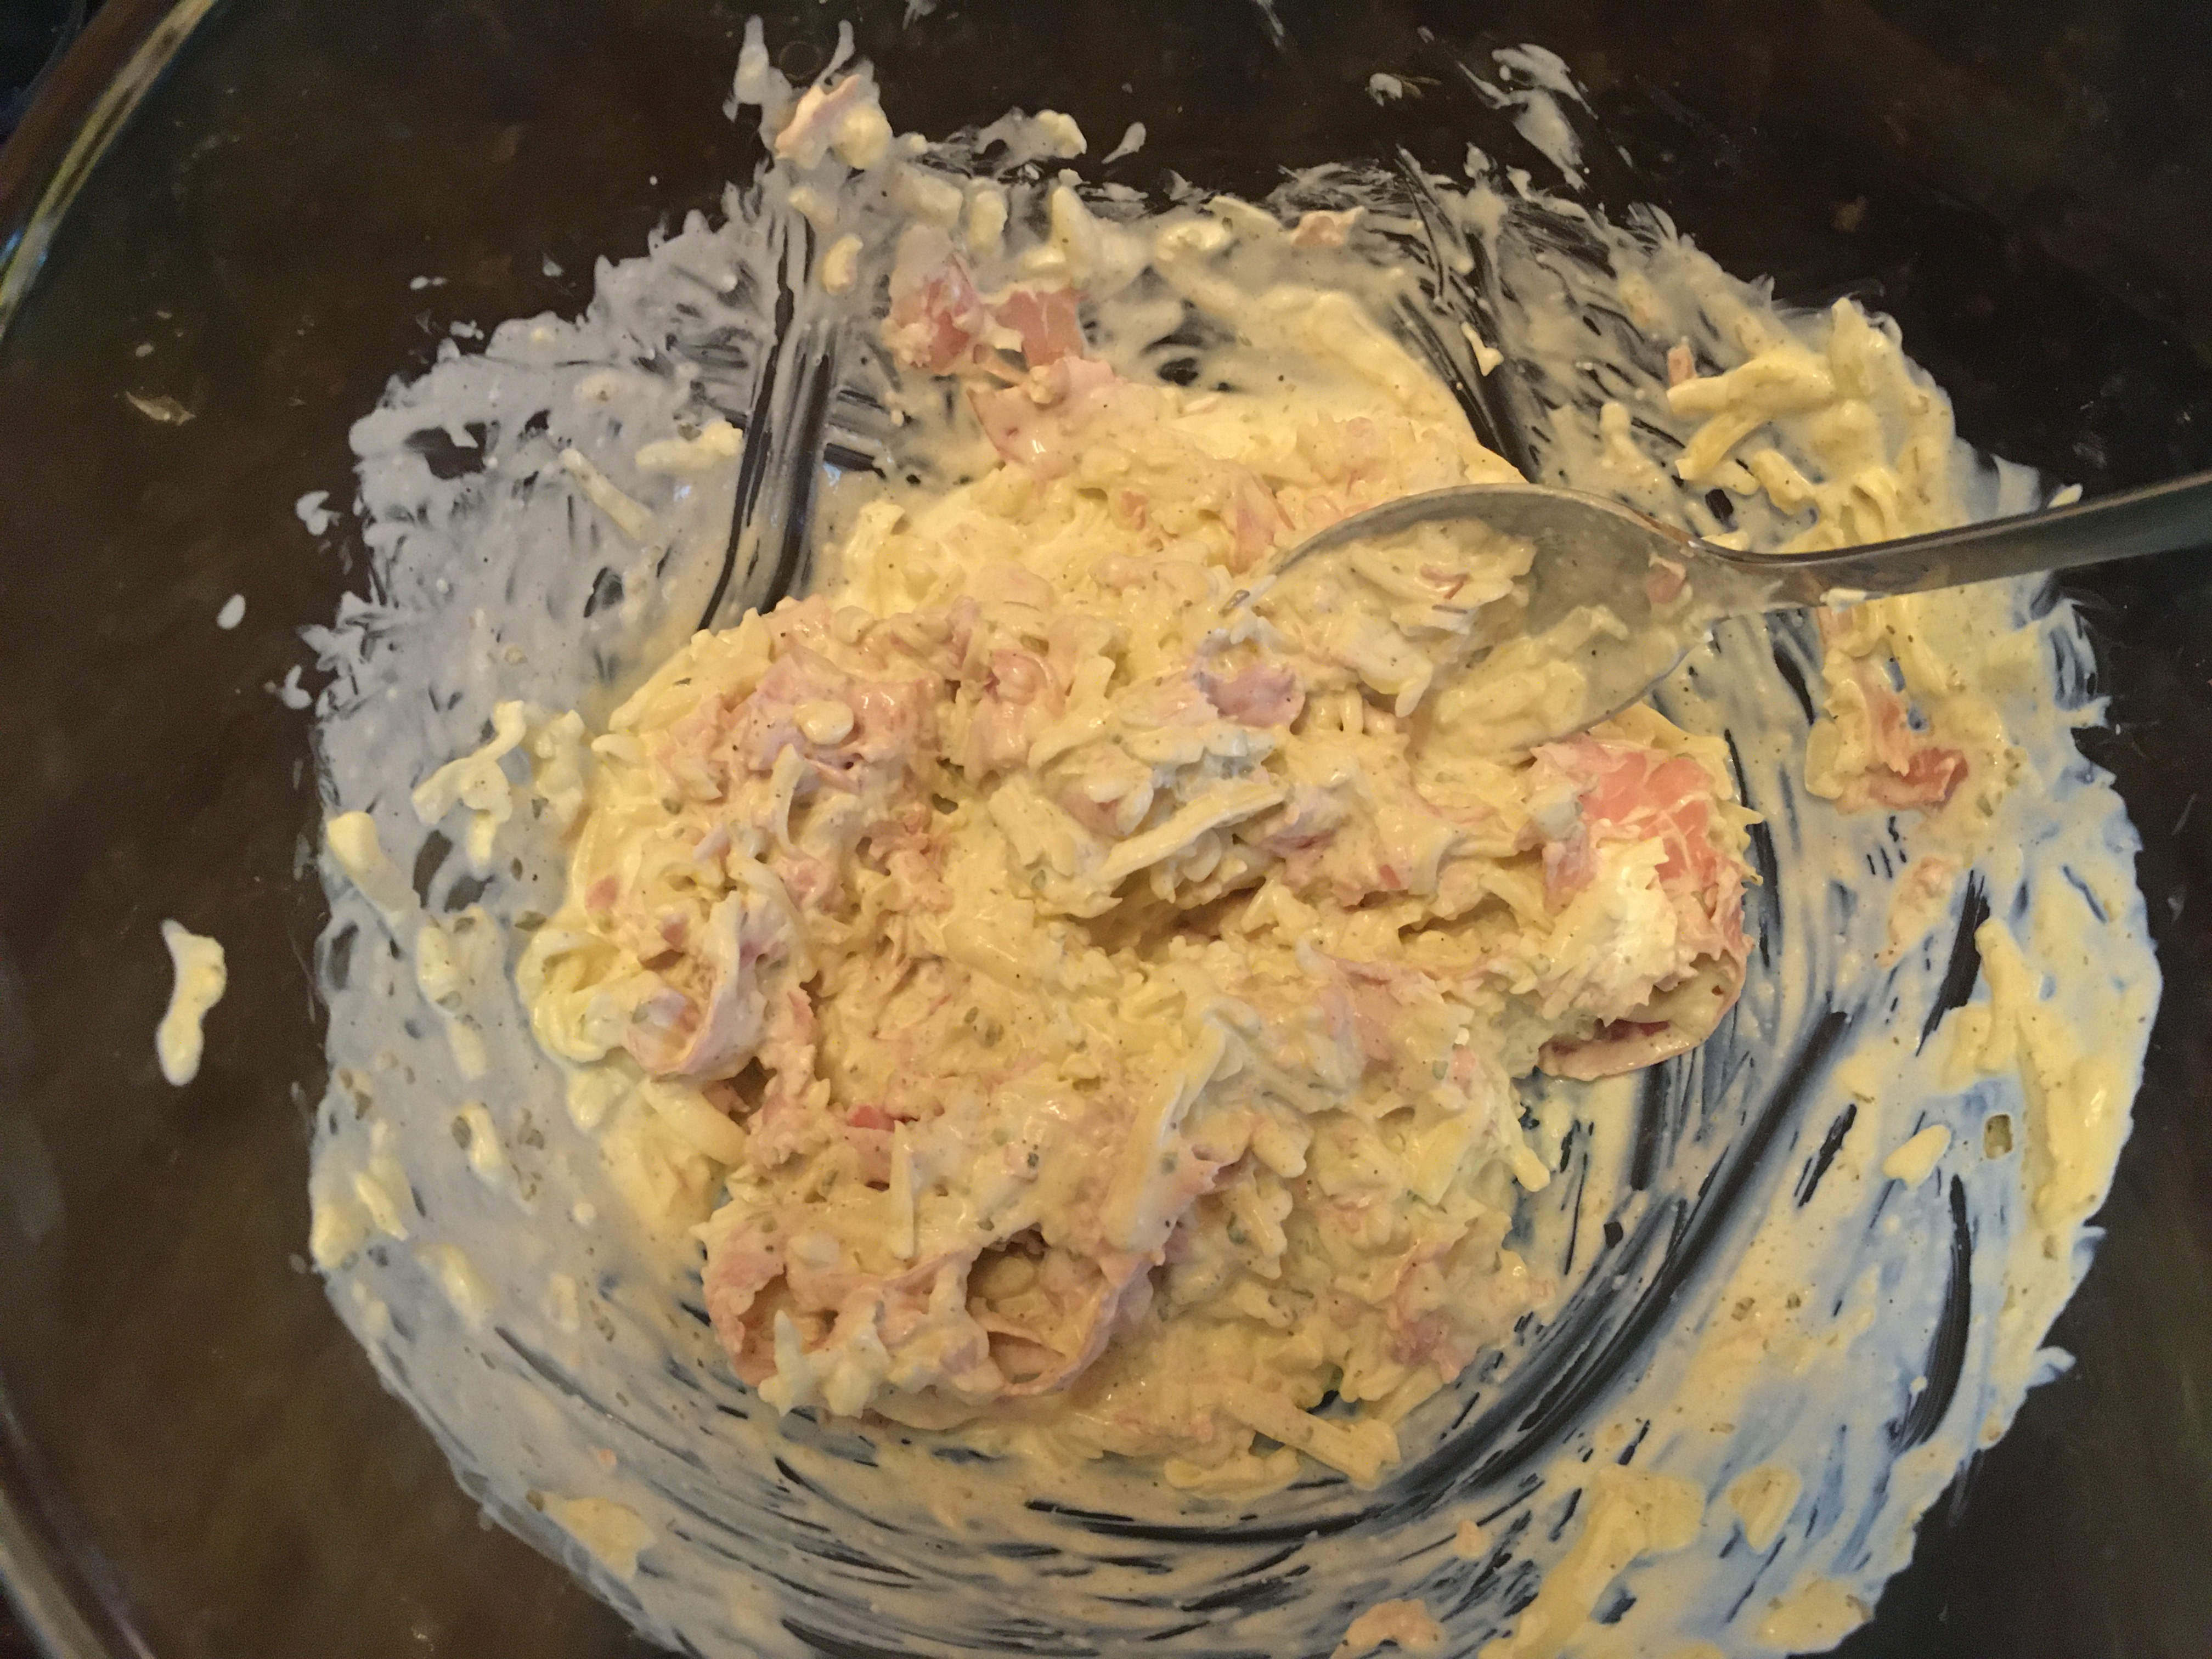
  • In a large mixing bowl put in the crème fraîche, grated mozzarella, pizza seasoning*, the ham and a small amount of the double cream to bind.  (Make sure you don’t put too much double cream in the mixture otherwise it will become runny and will not work very well on the bread.) Mix well together.  *Taste the mixture to gauge the level of the seasoning*.  If it needs more seasoning, then add a little more and check again.  What you don’t want is to have too much seasoning at the beginning that it ends up tasting like soap or worse.

Pizza toast mix
This is the how the mixture’s consistency should be.

  • When the mixture is seasoned to your liking (it should not really need salt but add salt if you wish) take a slice of bread and spread an amount of the mixture on top of the bread evenly across and to the edges and repeat with the other slices of bread.  Don’t spread it too thickly but also not too thinly.  NB Do not toast the bread beforehand – it will ‘toast’ in the oven.
  • Place the slices of bread onto a baking tray and put in the oven for approximately 10 minutes.  Check to see that topping has browned a little then remove and serve.

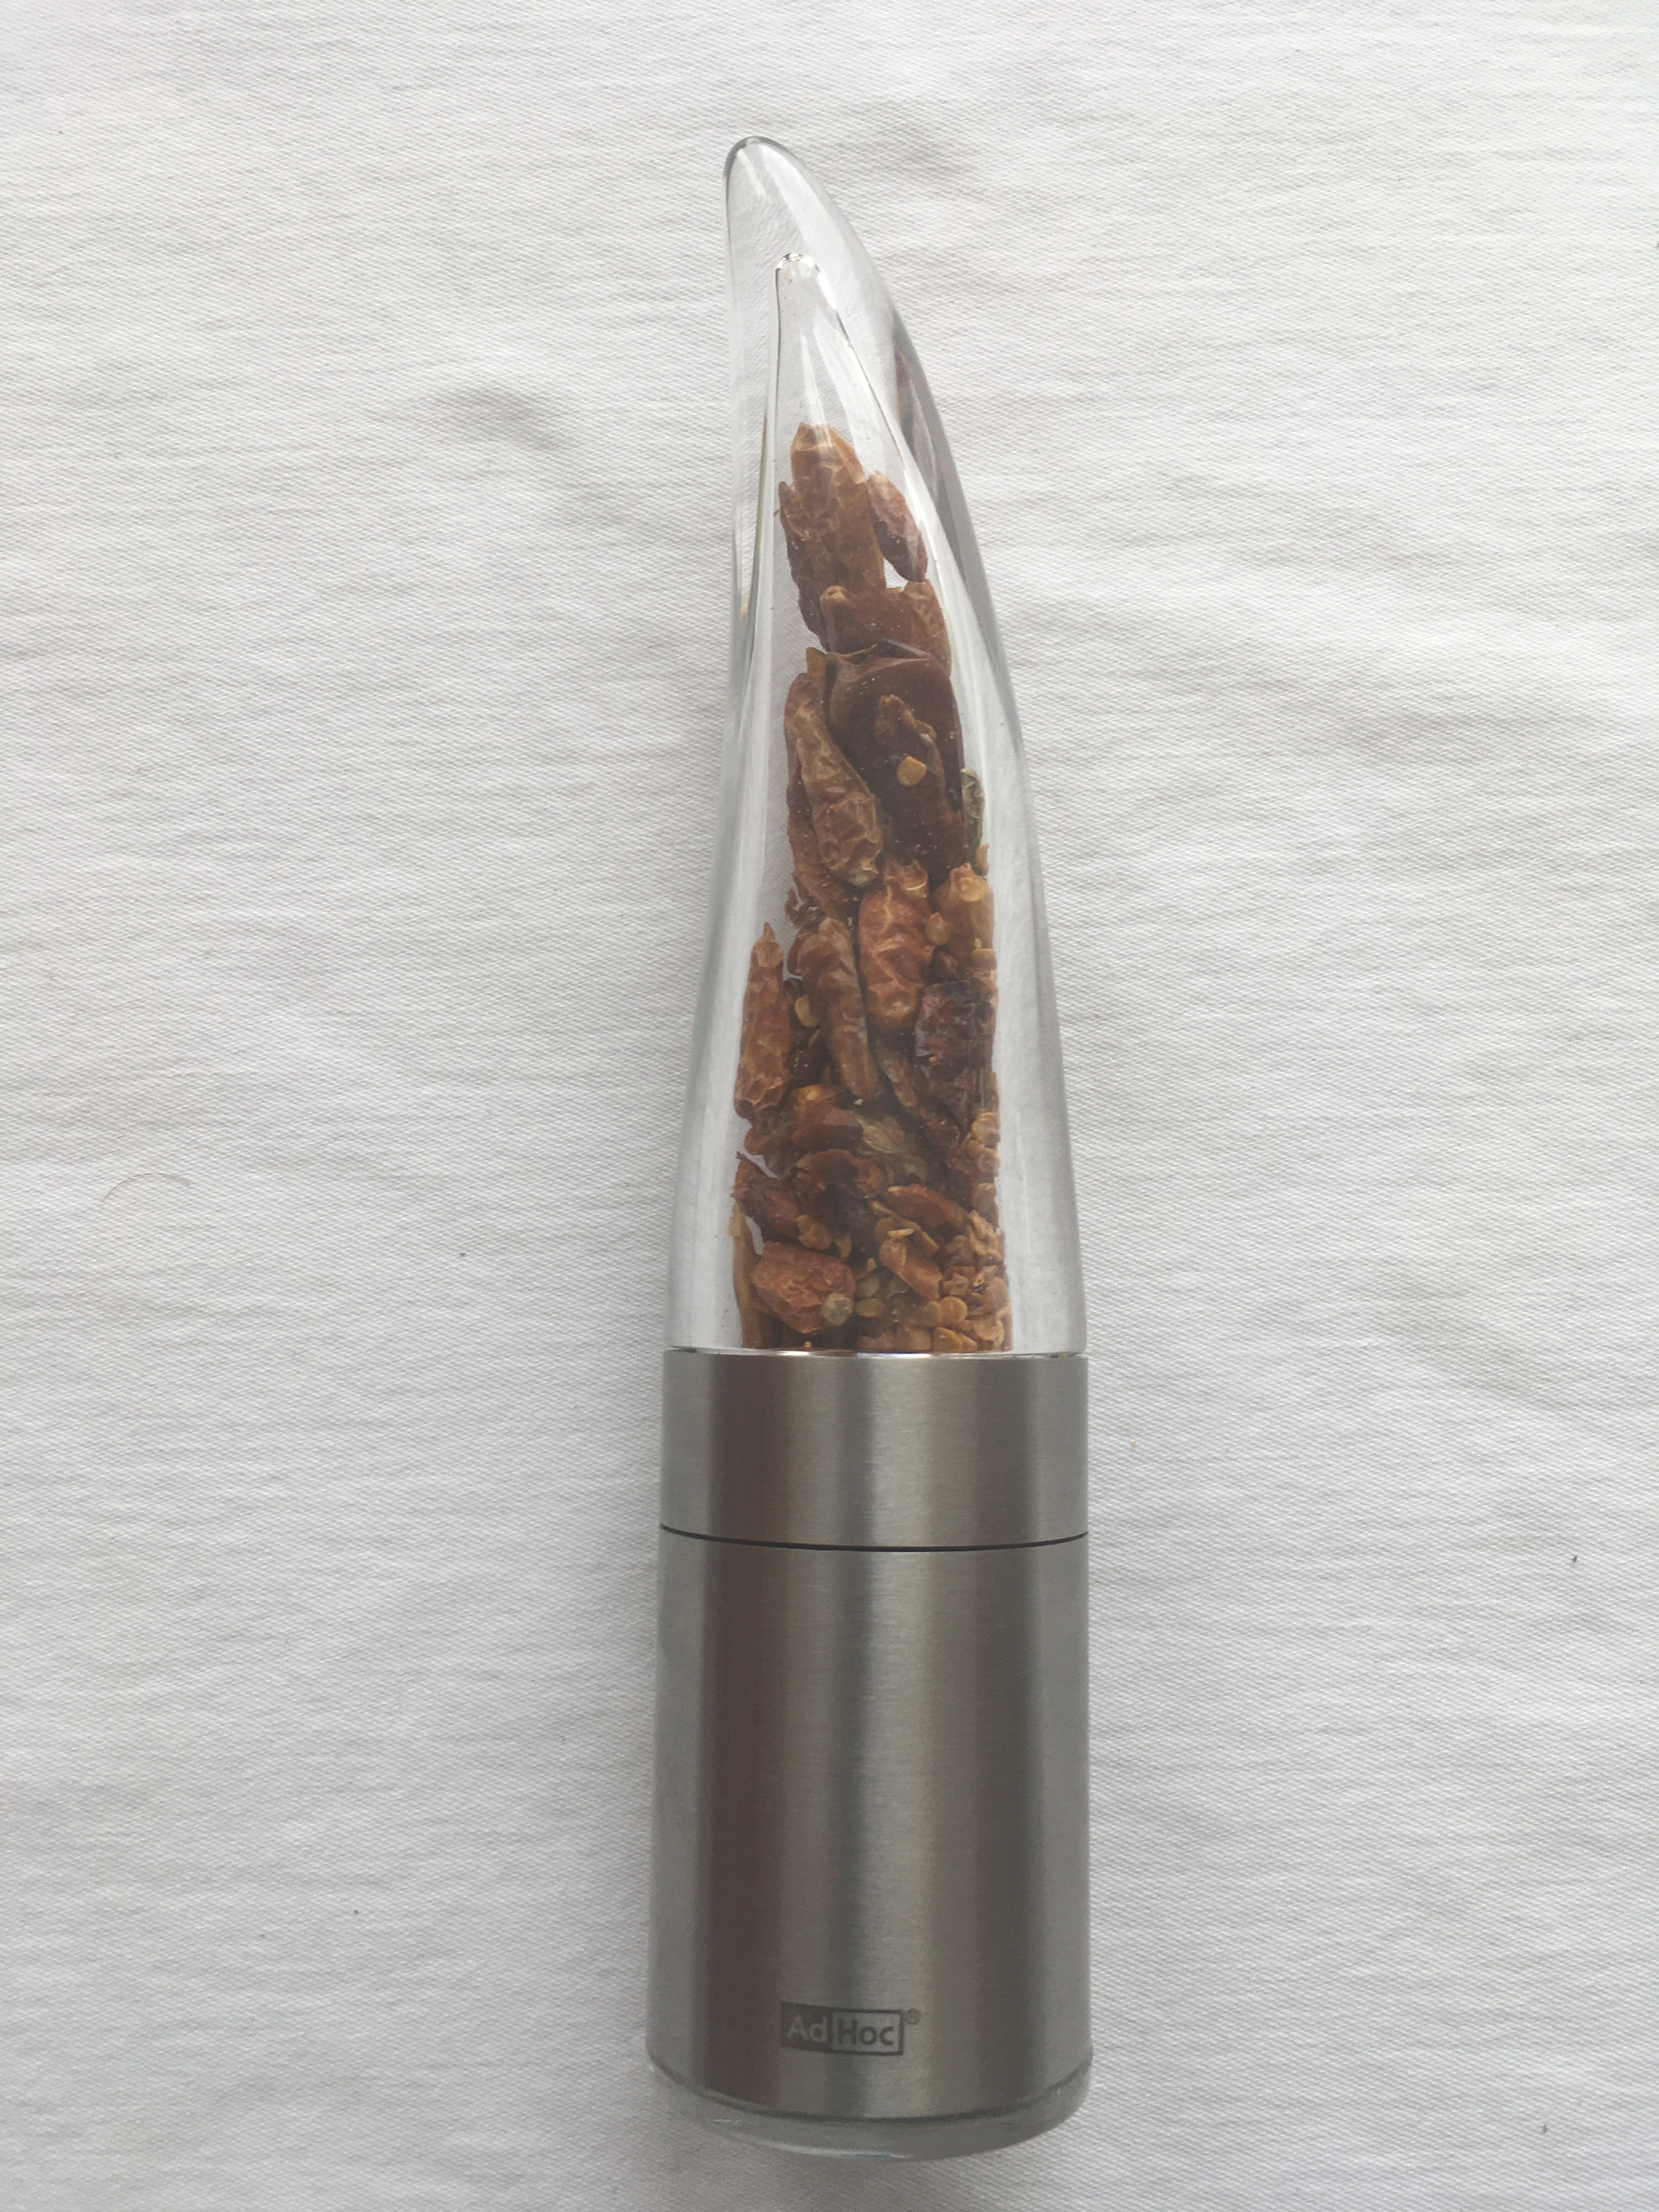
My cousin’s husband, Jos, is very fond of chilli and he likes to grate a little dried chilli over his slices of pizza toast (which I recommend you try too!) and he has a very smart chilli mill in order to do so.  The following day my sister, niece and I went to one of my favourite cook shops, Klammerth, in the Herrengaße in Graz and we bought ourselves the same mill which Natalie christened the Chilldo!

Chilldo

Making your own pizza seasoning is simple enough.  All you need to do is mix together a quantity of the following dried spices and what you do not use for making the pizza toast store in a screw-top jar or air-tight container and keep alongside your dried spices for use in other dishes.

Own-made Italian/Pizza seasoning:

  • 1 tsp dried Oregano
  • 1 tsp dried Onion granules
  • 1tsp dried Garlic granules
  • 1tsp black or white ground pepper
  • 1tsp dried Rosemary
  • 1tsp dried Sage

Mix together in a bowl and et voilà!

Postscript: When I mentioned in my last post that I had been encouraged by my sisters and niece to get on with posting again I received a cacophony of complaints from chums who felt aggrieved at not being mentioned because they claimed that they too had nagged, I mean, encouraged me.  Therefore, I shall add the following names to the list –  Ian in Wales and Gill in Scotland!   And to anyone not mentioned I do apologise and thank you for your encouragement!  Little did I think that my humble blog would take on the significance akin to The Simpsons whereby the great and the good fall over themselves to be included!


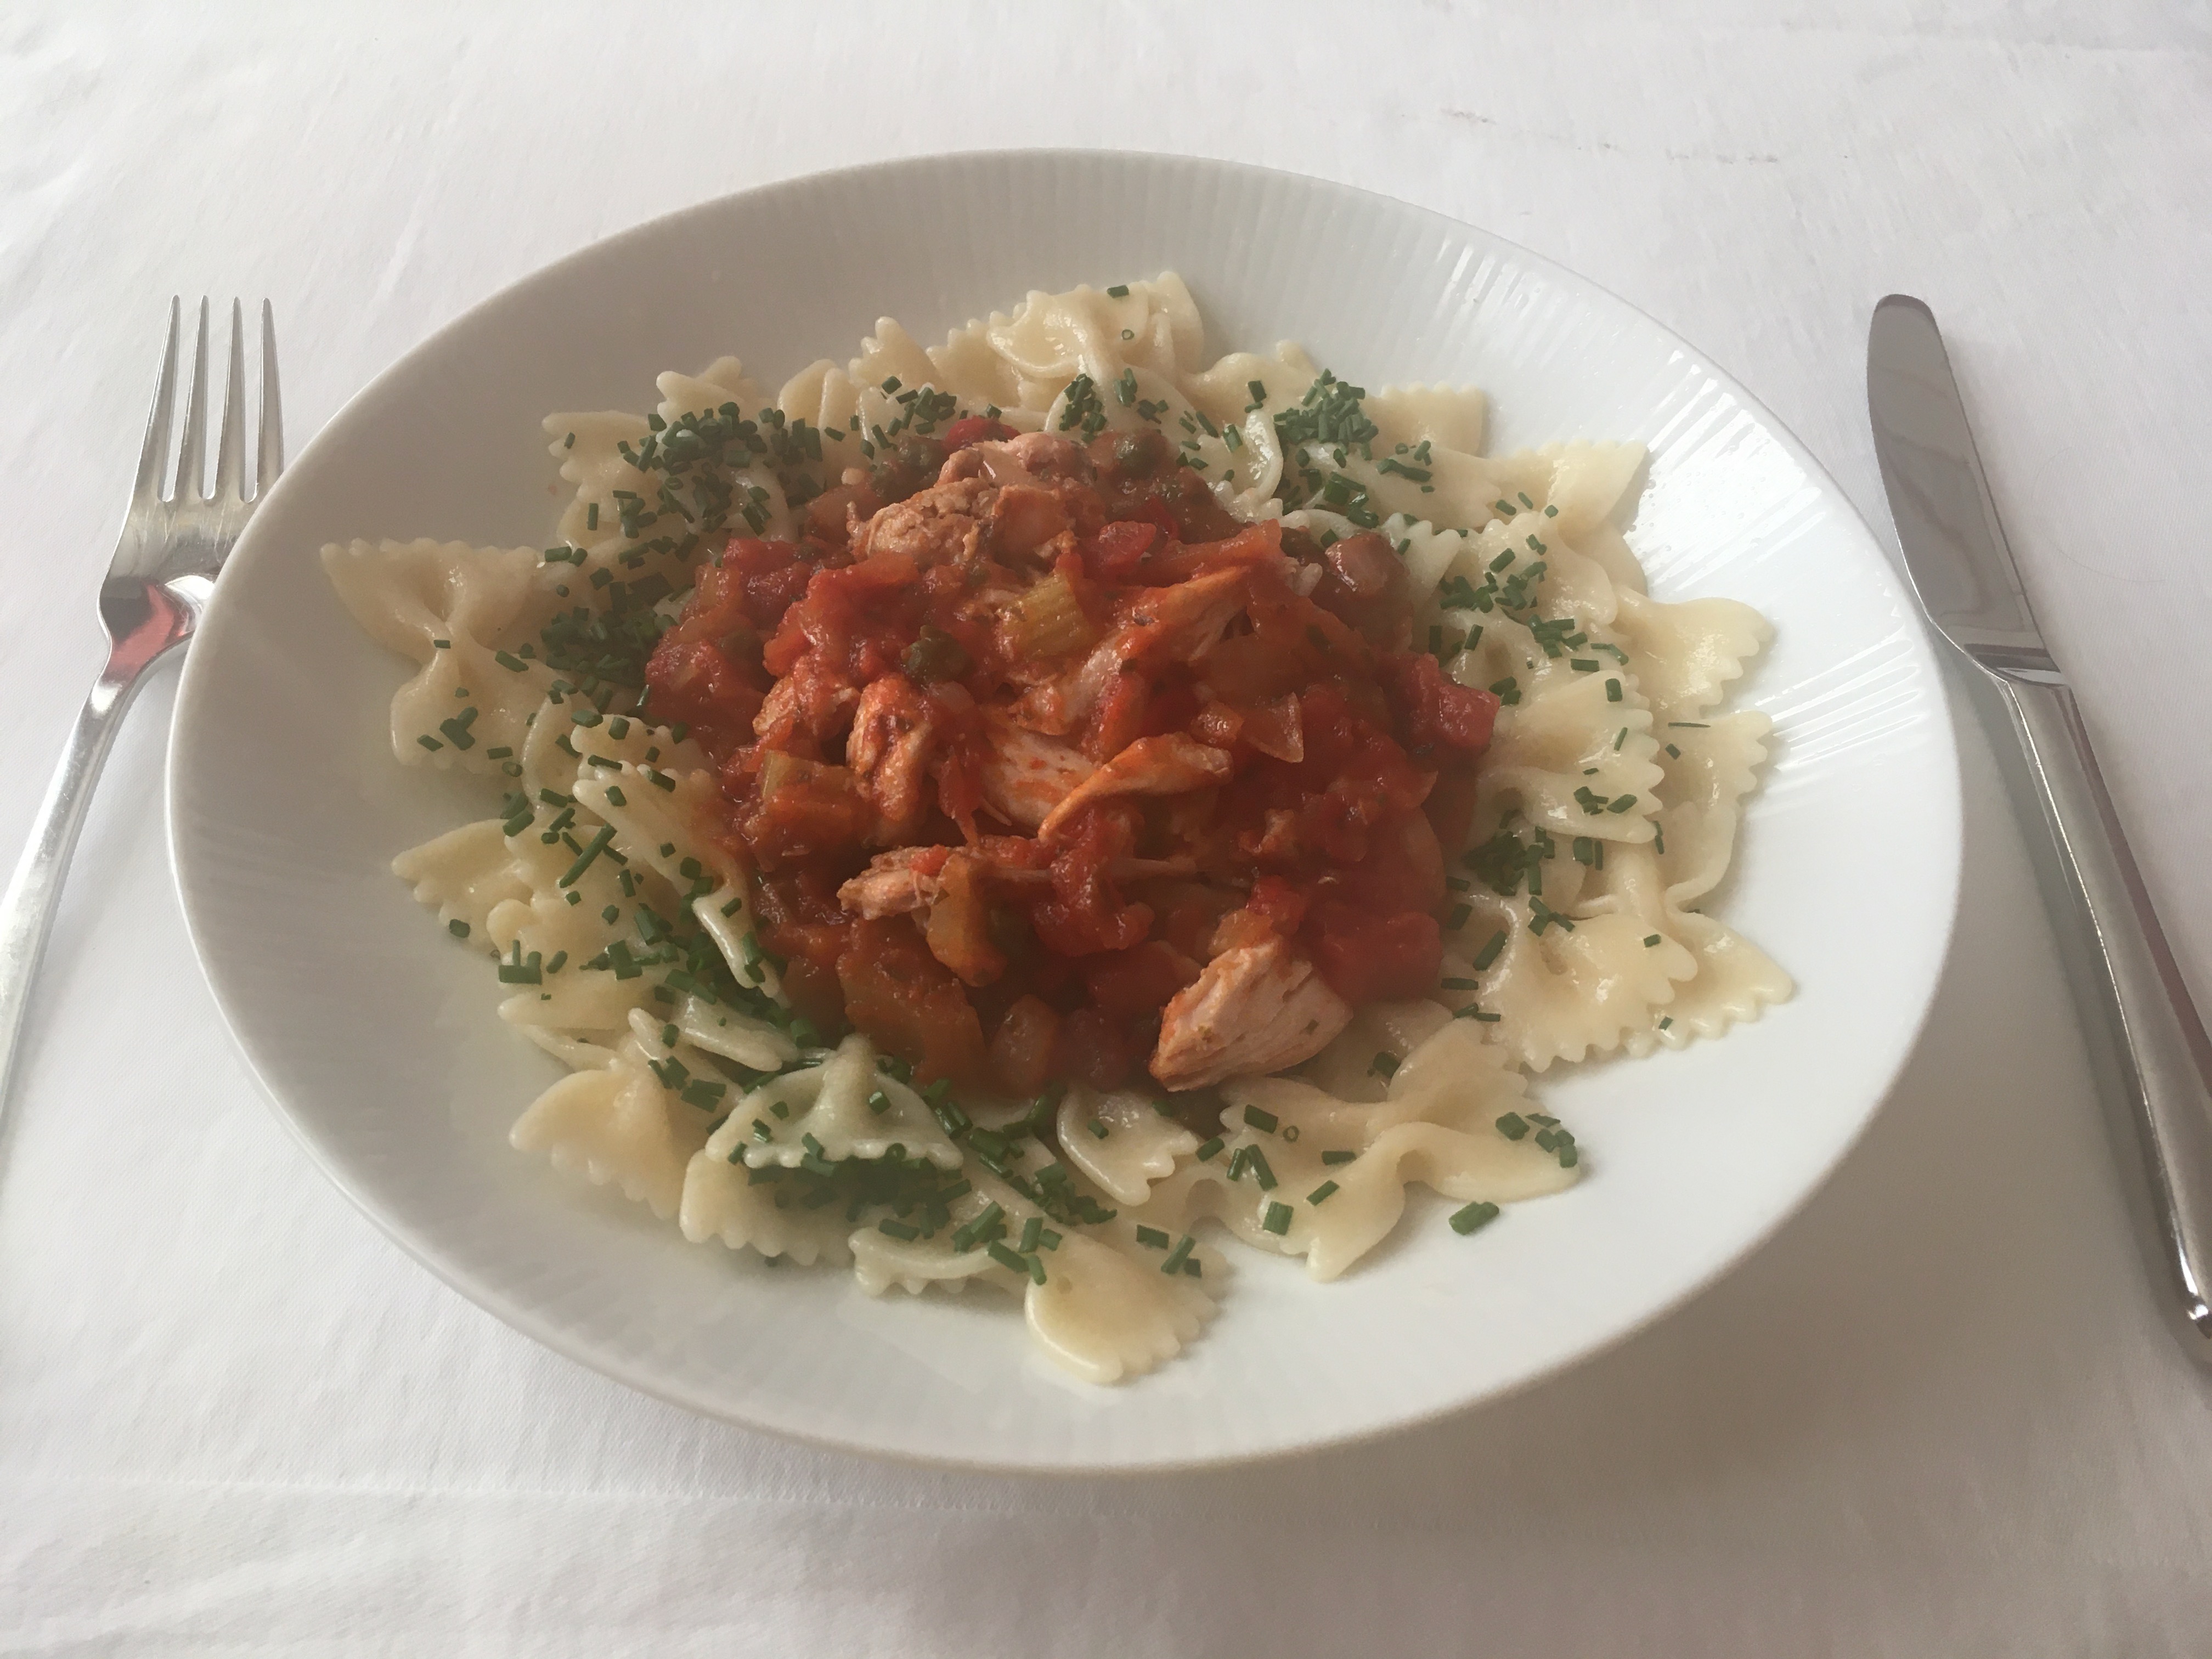
Pollo All’ Apulia (Chicken Apulia)

IMG_3906Well, I was rather shocked when I logged into my blog to see that it has been over two years since I last posted a recipe! And so, after some nagging, I mean, encouragement from my sisters and niece I thought it was high time to post once more.
This recipe is from Elodia Rigante’s Italian Immigrant Cooking published in America in 1995 originally by First View Books and then by Stewart, Tabori & Chang in 1996 which is when I got to know the book because at that time Stewart, Tabori & Chang was a client publisher of mine.  This recipe book has become something of a favourite of mine so too of my friend Heather.

I have taken a couple of liberties with this recipe one of which is that I omit the olives.  It’s not that I don’t like olives, but I much prefer to eat them stuffed with garlic, or anchovy, or pimento accompanied by an aperitif or plopped into a dry martini.  The second liberty, more of a short-cut really, is that I often don’t bother dipping the chicken pieces in the egg-wash.  I will, however, include the egg-wash in the method and you can decide for yourself. 

Elodia’s recipe calls for a 3-4lb chicken cut into eight pieces however I find it much easier to use pre-packed chicken thighs.  Depending on how plump the thighs are I find that one thigh per person is enough when accompanied with the sauce and pasta.  And on that note, I follow Elodia’s suggestion and serve my chicken Apulia with farfalle (bow-tie pasta).

What you’ll need for four people as a main course is:

  • 4 chicken thighs with skin and bone in
  • Olive oil
  • 2 eggs, beaten
  • Flour for dipping
  • 1 large onion chopped
  • 2 cloves garlic crushed
  • 3 large stalks of celery chopped
  • 1 tin of tomatoes (400gr/14oz)
  • 1 handful of fresh basil or 1 to 2 tsp of dried basil
  • 113gr (4oz/½ cup) sliced olives if desired
  • 1 – 2 tbs capers
  • ½ tsp sugar
  • 113 ml (4 fl. oz/ ½cup) white wine
  • Salt and pepper

What you’ll need to do:

  • Heat the oven to 180C/350F/Gas mark 4
  • Heat the olive oil in a casserole dish large enough to take the chicken pieces in one layer.
  • Coat each pieces of chicken in the beaten egg then coat with flour and fry until golden brown on both sides.  Remove chicken pieces to a warm plate.  NB Simply brown the pieces and do not over-cook because the chicken will be baked in the oven later
  • If you prefer to skip the stage above (egg or flour intolerance for example or to simply cut out a messy bit of the process) follow the instructions above for frying the chicken.
  • Add the onion and garlic in the remaining olive oil (add a bit more if you think you might need it) and sauté for a few minutes ensuring you do not brown the onions and garlic.
  • Add the celery and sauté for a further few minutes
  • Add the tomatoes, wine (rinse the tomato can with the wine to get the remnants of the juices from the tin) basil, olives (if using) capers and sugar.  Simmer for 10 minutes and check the seasoning adding salt and pepper if desired.
  • Place chicken pieces back into the casserole, pop the lid on and shove it into the oven for 45 minutes to an hour.  Check that the chicken is cooked through.

To serve put a portion of the farfalle onto your pasta plate (you could dress the pasta with melted butter and chopped chives for that extra élan) then a dollop of the sauces followed by the chicken.  I tend to remove the skin and take the meat off the bone before serving especially if I am serving this dish to guests.

For a vegetarian version simply leave the chicken out and simmer the veggie sauce on top of the cooker/stove.


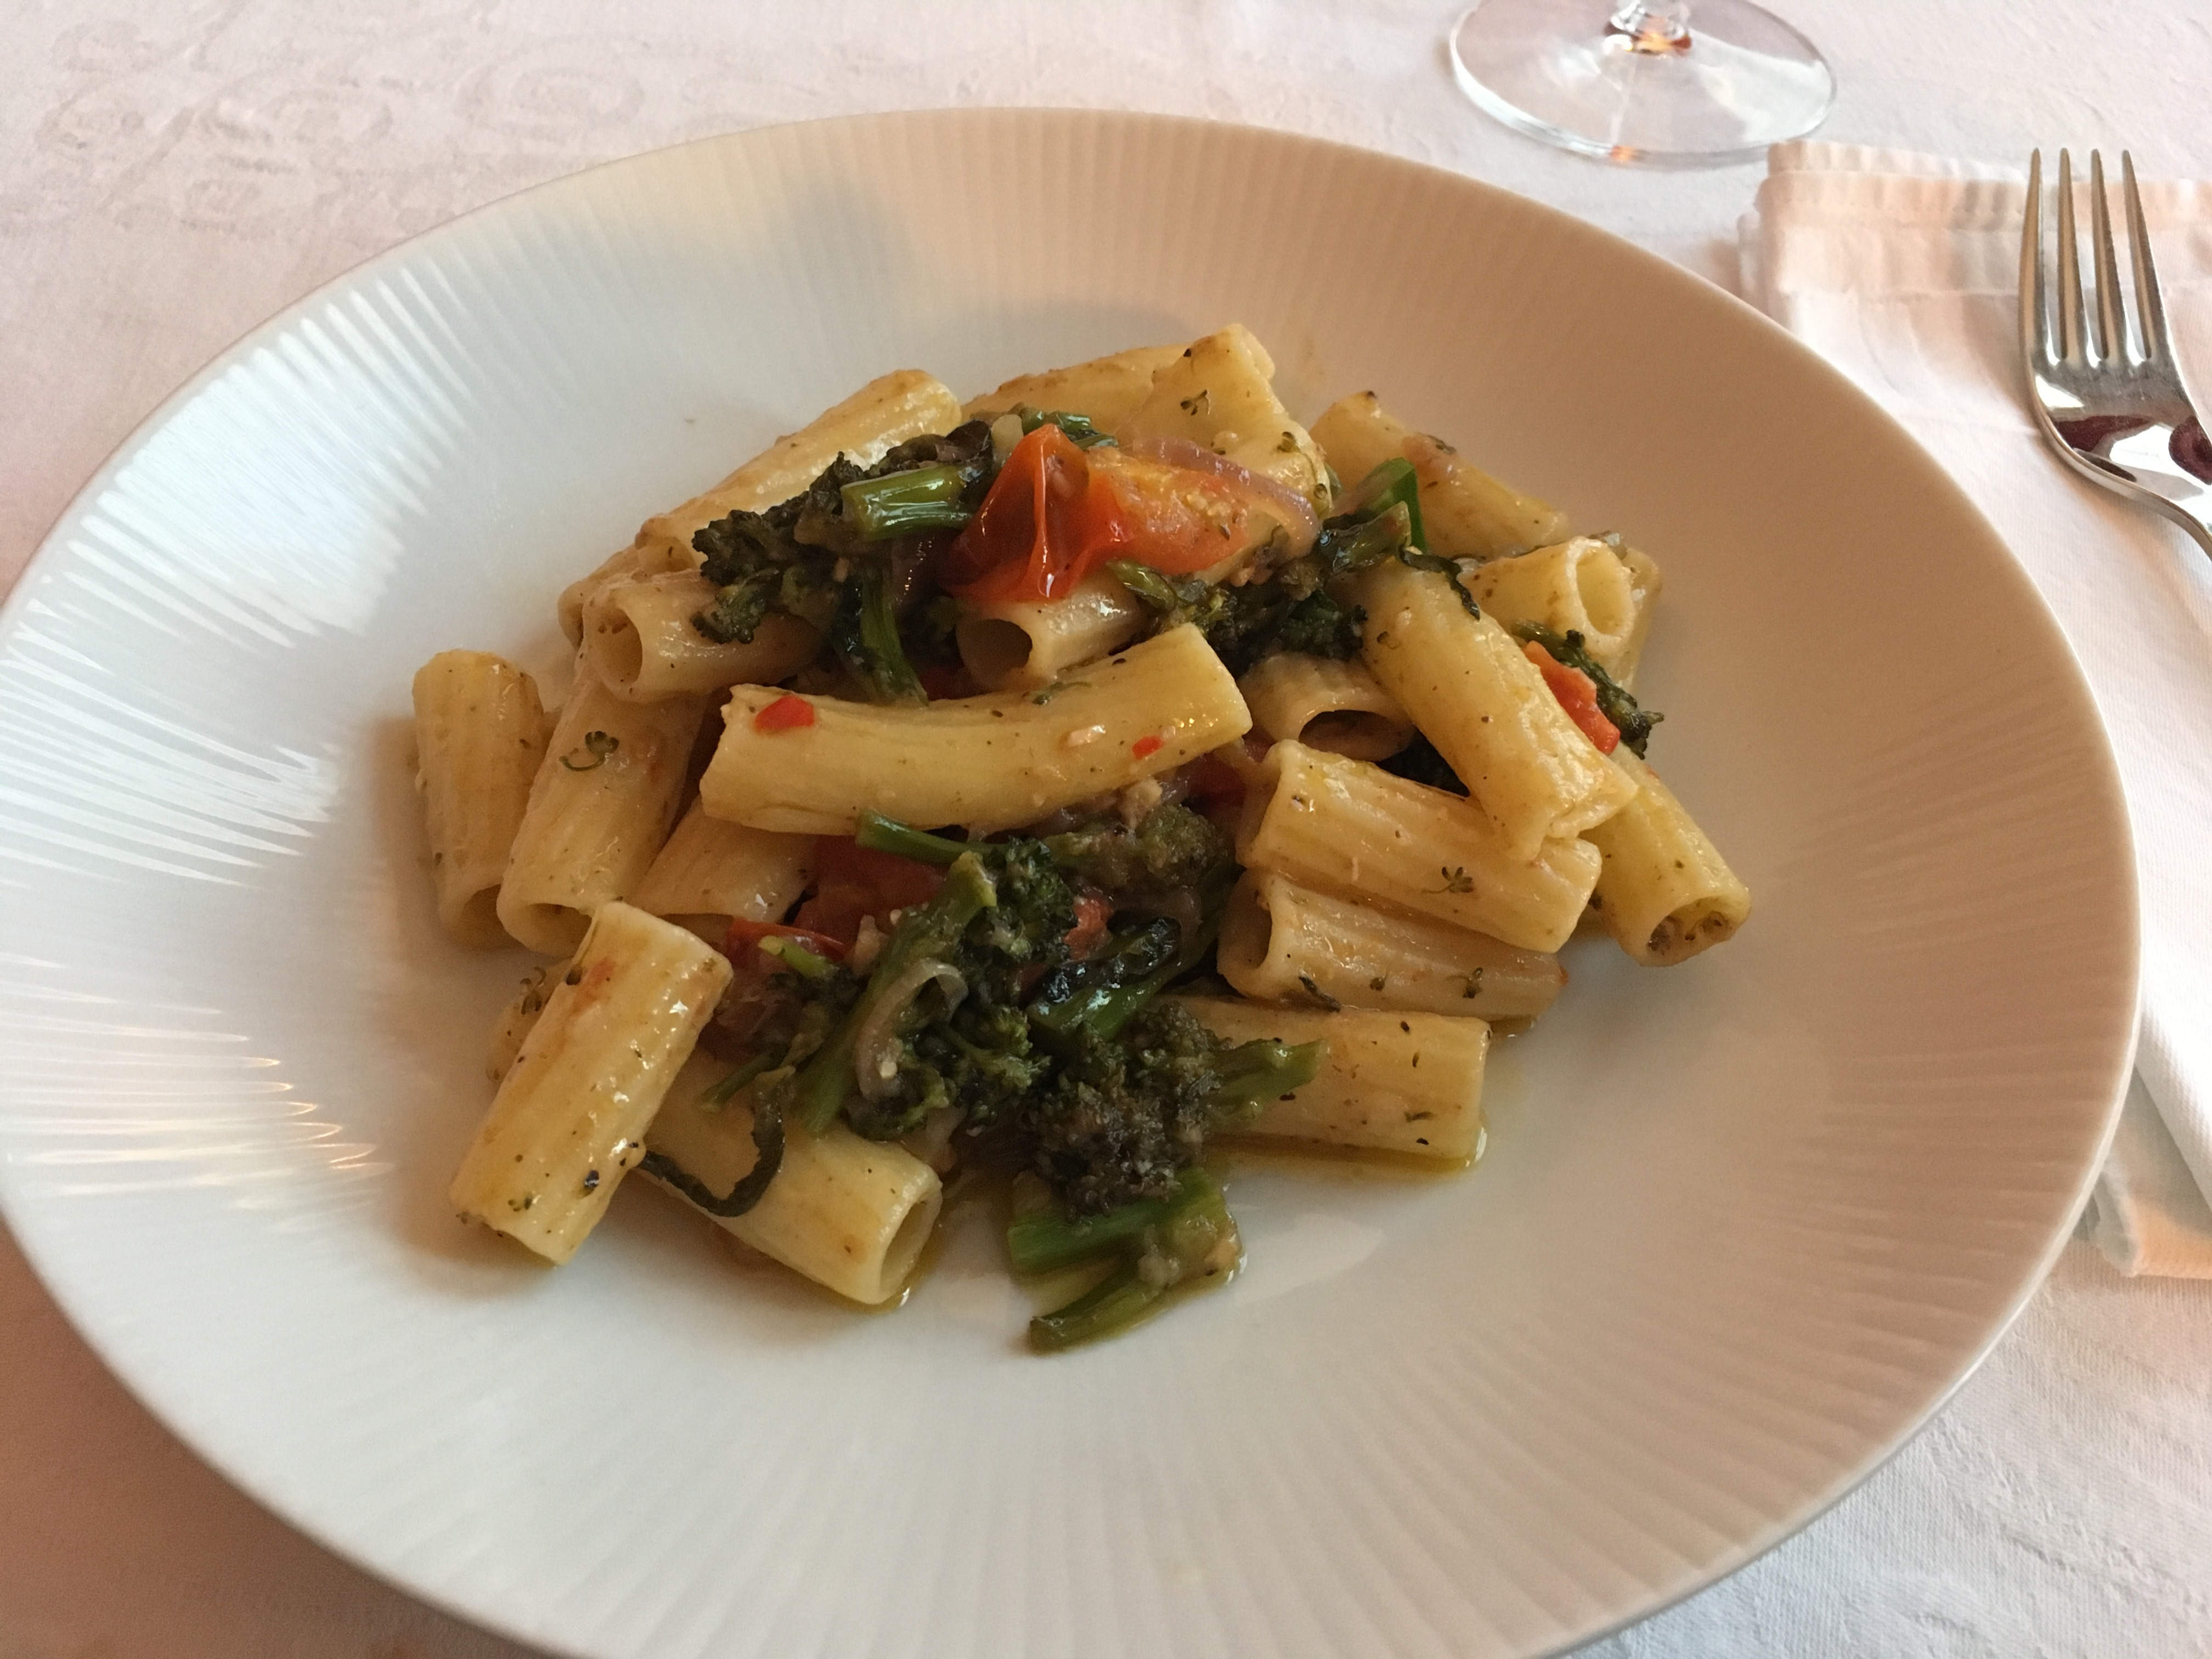
Pasta with purple sprouting broccoli

2018-04-16 19.37.29

This dish is a variation of a recipe by Alastair Little found on the BBC’s Food website and came about for two reasons.  The first is that I really do need to eat more vegetables and the second is that I was given some purple sprouting broccoli by my friend Joy, who, in turn had been given it by her neighbour who grew it.  Joy decided to share her bounty (along with three sticks of rhubarb) with me.

The variation is the inclusion of red onion and cherry tomatoes which don’t appear in Mr Little’s recipe.

What you’ll need for two people as a main course is:

  • 1 red onion peeled and sliced
  • 8oz/225gr purple sprouting broccoli
  • 20 cherry tomatoes cut in halves
  • 2 cloves garlic peeled
  • 1 fresh chilli.
  • 1 small tin of anchovy fillets in olive oil, drained*
  • Good quality olive oil
  • 8oz/225gr pasta – choose between fusilli, penne rigate or, as I used in my recipe, tortiglioni
  • Grated parmesan or Grana Padano cheese
  • Salt and pepper

* If, like my niece Natalie, you don’t care for anchovies, or you wish to make the dish purely a veggie one omit the anchovies – the dish will be just as tasty.   If you do like anchovies but don’t want to use the whole tin use half instead.

What you’ll need to do:

  • Put on a large pan of salted water to boil.
  • Whilst the pasta water is coming to the boil prepare the broccoli by trimming the outer leaves and woody stalks.  Once done cut the brocoli into small pieces about 1cm/½.inch
  • Chop the garlic, chilli and anchovies finely.  I used my Cuisinart Mini Processor which does the job very well.  NB When it comes to prepping the chilli, if you like your dish fiery then chop the chilli whole including the seeds (hottest bit).  If you prefer a milder dish them slice the chilli in half and scrape away the seeds and discard then chop the chilli.
  • Once the pasta water has boiled add the pasta to the water, stir and cook according to taste or to the time suggested on the packet.
  • In the meantime take a large sauté pan or frying pan with high sides and place on the heat and slop in 3-4 tablespoons of olive oil.  Add the sliced red onion and cook over a low heat (you do not want the onions to brown or burn but be translucent) stirring from time to time.
  • Add the garlic/chilli/anchovy mix and stir coating the onions.   Then add the broccoli allowing it to cook a little then add the tomatoes and stir together.
  • At this point check the seasoning – the anchovies may be salty enough and all you need do is add a little ground pepper (black or white) if you wish.
  • Add a little (small ladle-full) of the pasta water to the brocoli/onion mix and let it bubble.
  • Once the pasta is cooked, drain and tip into the sauté pan and mix well.
  • If you wish, at this stage shower the contents of the sauté pan with the grated cheese (the amount of which is down to your taste) stirring so that it all gets well coated and you are ready to serve.


2018-04-16 19.19.40-2


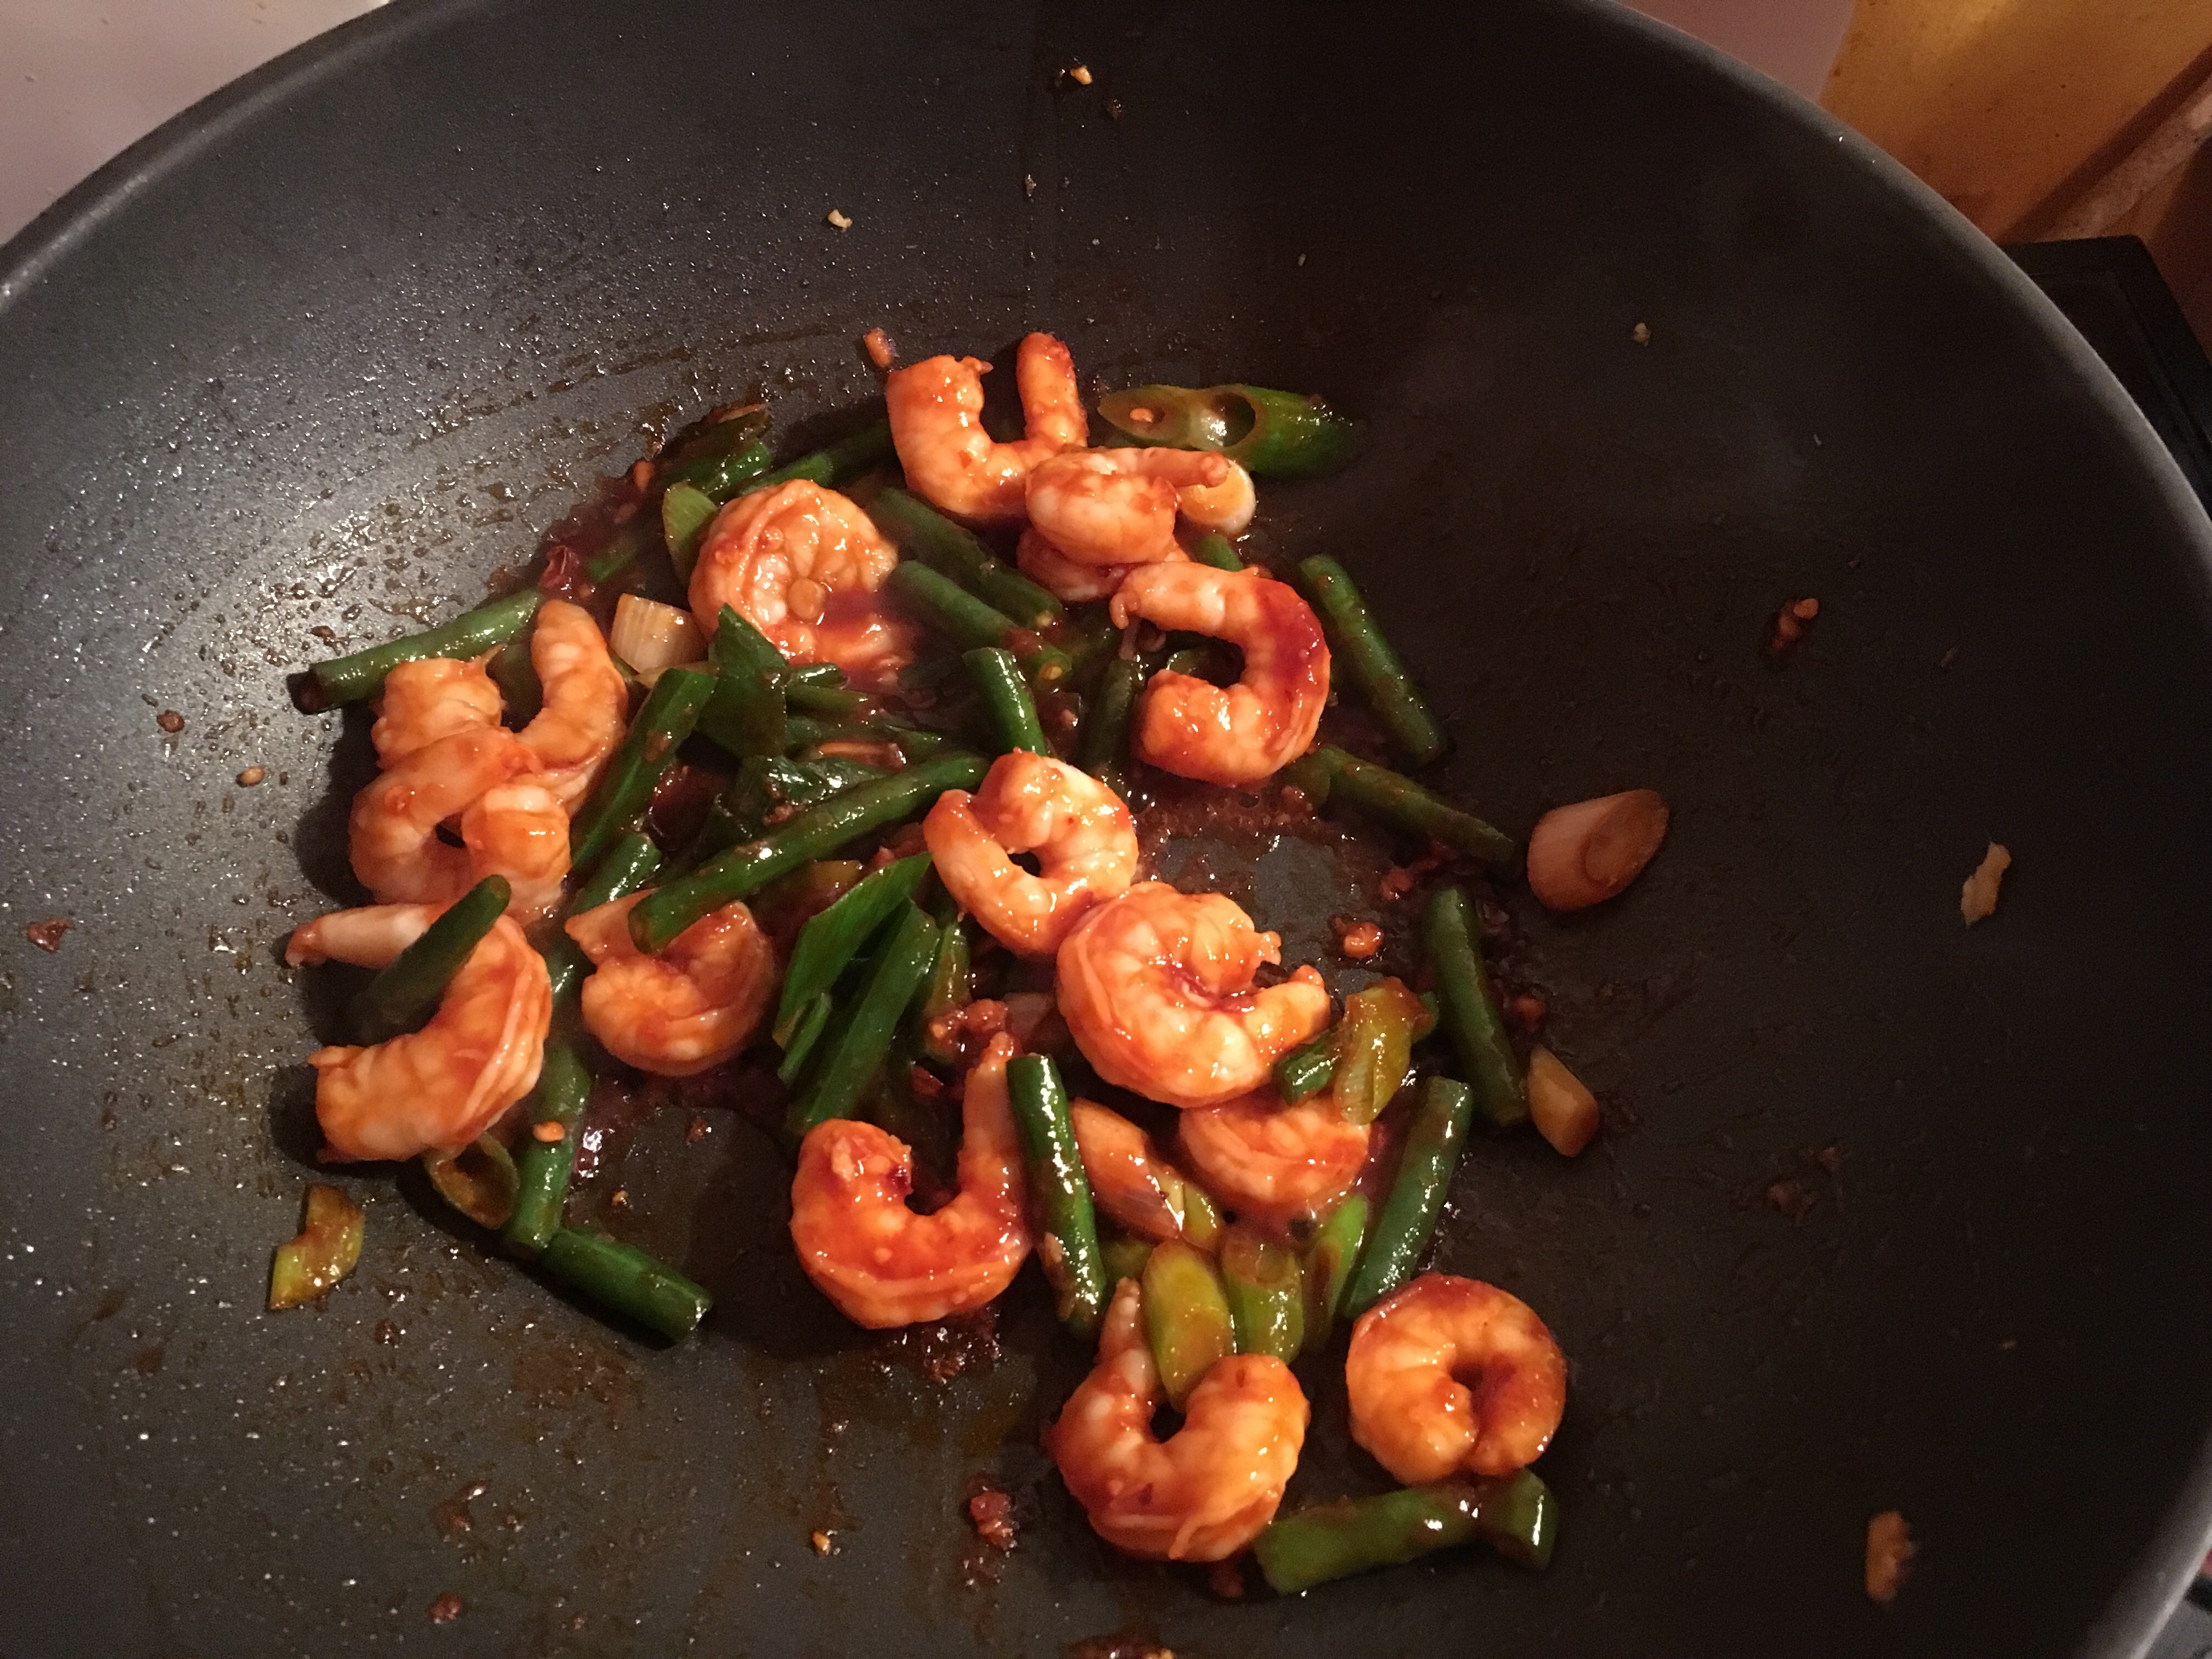
Garlic chilli prawns with green beans

fullsizeoutput_e04

It may seem as though I am getting a lot of inspiration from Waitrose of late however it is a coincidence – really!.  That said, this recipe is one of the latest in its card series for February and I cooked it the other night and thought it ideal for a quick tasty Friday night dinner.  Or any night for that matter.

I have tweaked this recipe a bit too because I thought that the quantities given for the sauce in the original were a bit on the meagre side.  Whilst you don’t want your dish to be awash with sauce you do want to have enough to taste and enjoy.

The quantities I have given to make up the sauce (tomato paste, rice vinegar et al) can be fiddled with to suit your own taste and how much you think you may want but the trick is mix as you go along and adjust/add accordingly.

What you’ll need for two people as a main course is:

  •  180 g / 6 oz  raw prawns (frozen or fresh)  Add or subtract the quantity according to your appetite.
  • 1 tbsp tomato purèe
  • 1 tsp chilli flakes (If you don’t like your food too fiery reduce the amount of chilli – or increase if you prefer it hotter!)
  • 1 tbsp Chinese rice vinegar*
  • 1 tbsp honey
  • 1 tbsp sesame oil
  • 1 tbsp soy sauce
  • 1 and a 1/2 tbsp vegetable oil
  • 200 g / 7 oz  fine green beans trimmed and cut into halves or thirds
  • 2 Salad/spring onions aka scallions sliced on the diagonal
  • 1 or 2 cloves of garlic crushed
  • 2 tsp finely grated fresh root ginger
  • 2-3 tsp sesame seeds toasted

*I would recommend that you do try to get  Chinese rice vinegar if you can because it has a nutty flavour which another rice vinegars (such as Japanese) may not.

Tip: The cooking time for this recipe is short so prepare everything in advance so all you have to do is throw each ingredient into the wok in turn.

To accompany:  Steamed rice or fried rice will, of course, go well with this dish.  Also egg noodles would be good too – they can be stirred into the mixture at the end before serving.  In either case, make sure you have your rice or noodles cooked ahead of stir-frying the prawns and kept warm.

What you’ll need to do:

  • Heat a frying pan over a medium to high heat.  Once the frying pan is hot tip the sesame seeds into the (dry) frying pan and toast the seeds.  Keep an eye on them and stir them around.  When they turn golden (not nut-brown) remove the frying pan from the heat and set seeds aside to cool.
  • Then heat the wok over a high heat and add the vegetable oil.
  • When the oil is hot add the beans, spring onions, garlic and ginger and stir-fry for about 30 seconds.
  • Add the prawns and fry for a minute  until they start to turn pink.
  • Tip in the sauce mixture ensuring that everything  is coated nicely and fry for another 2 minutes until the prawns are cooked through.
  • Just before serving sprinkle the toasted sesame seeds over the prawns.

fullsizeoutput_e06
In the wok they go


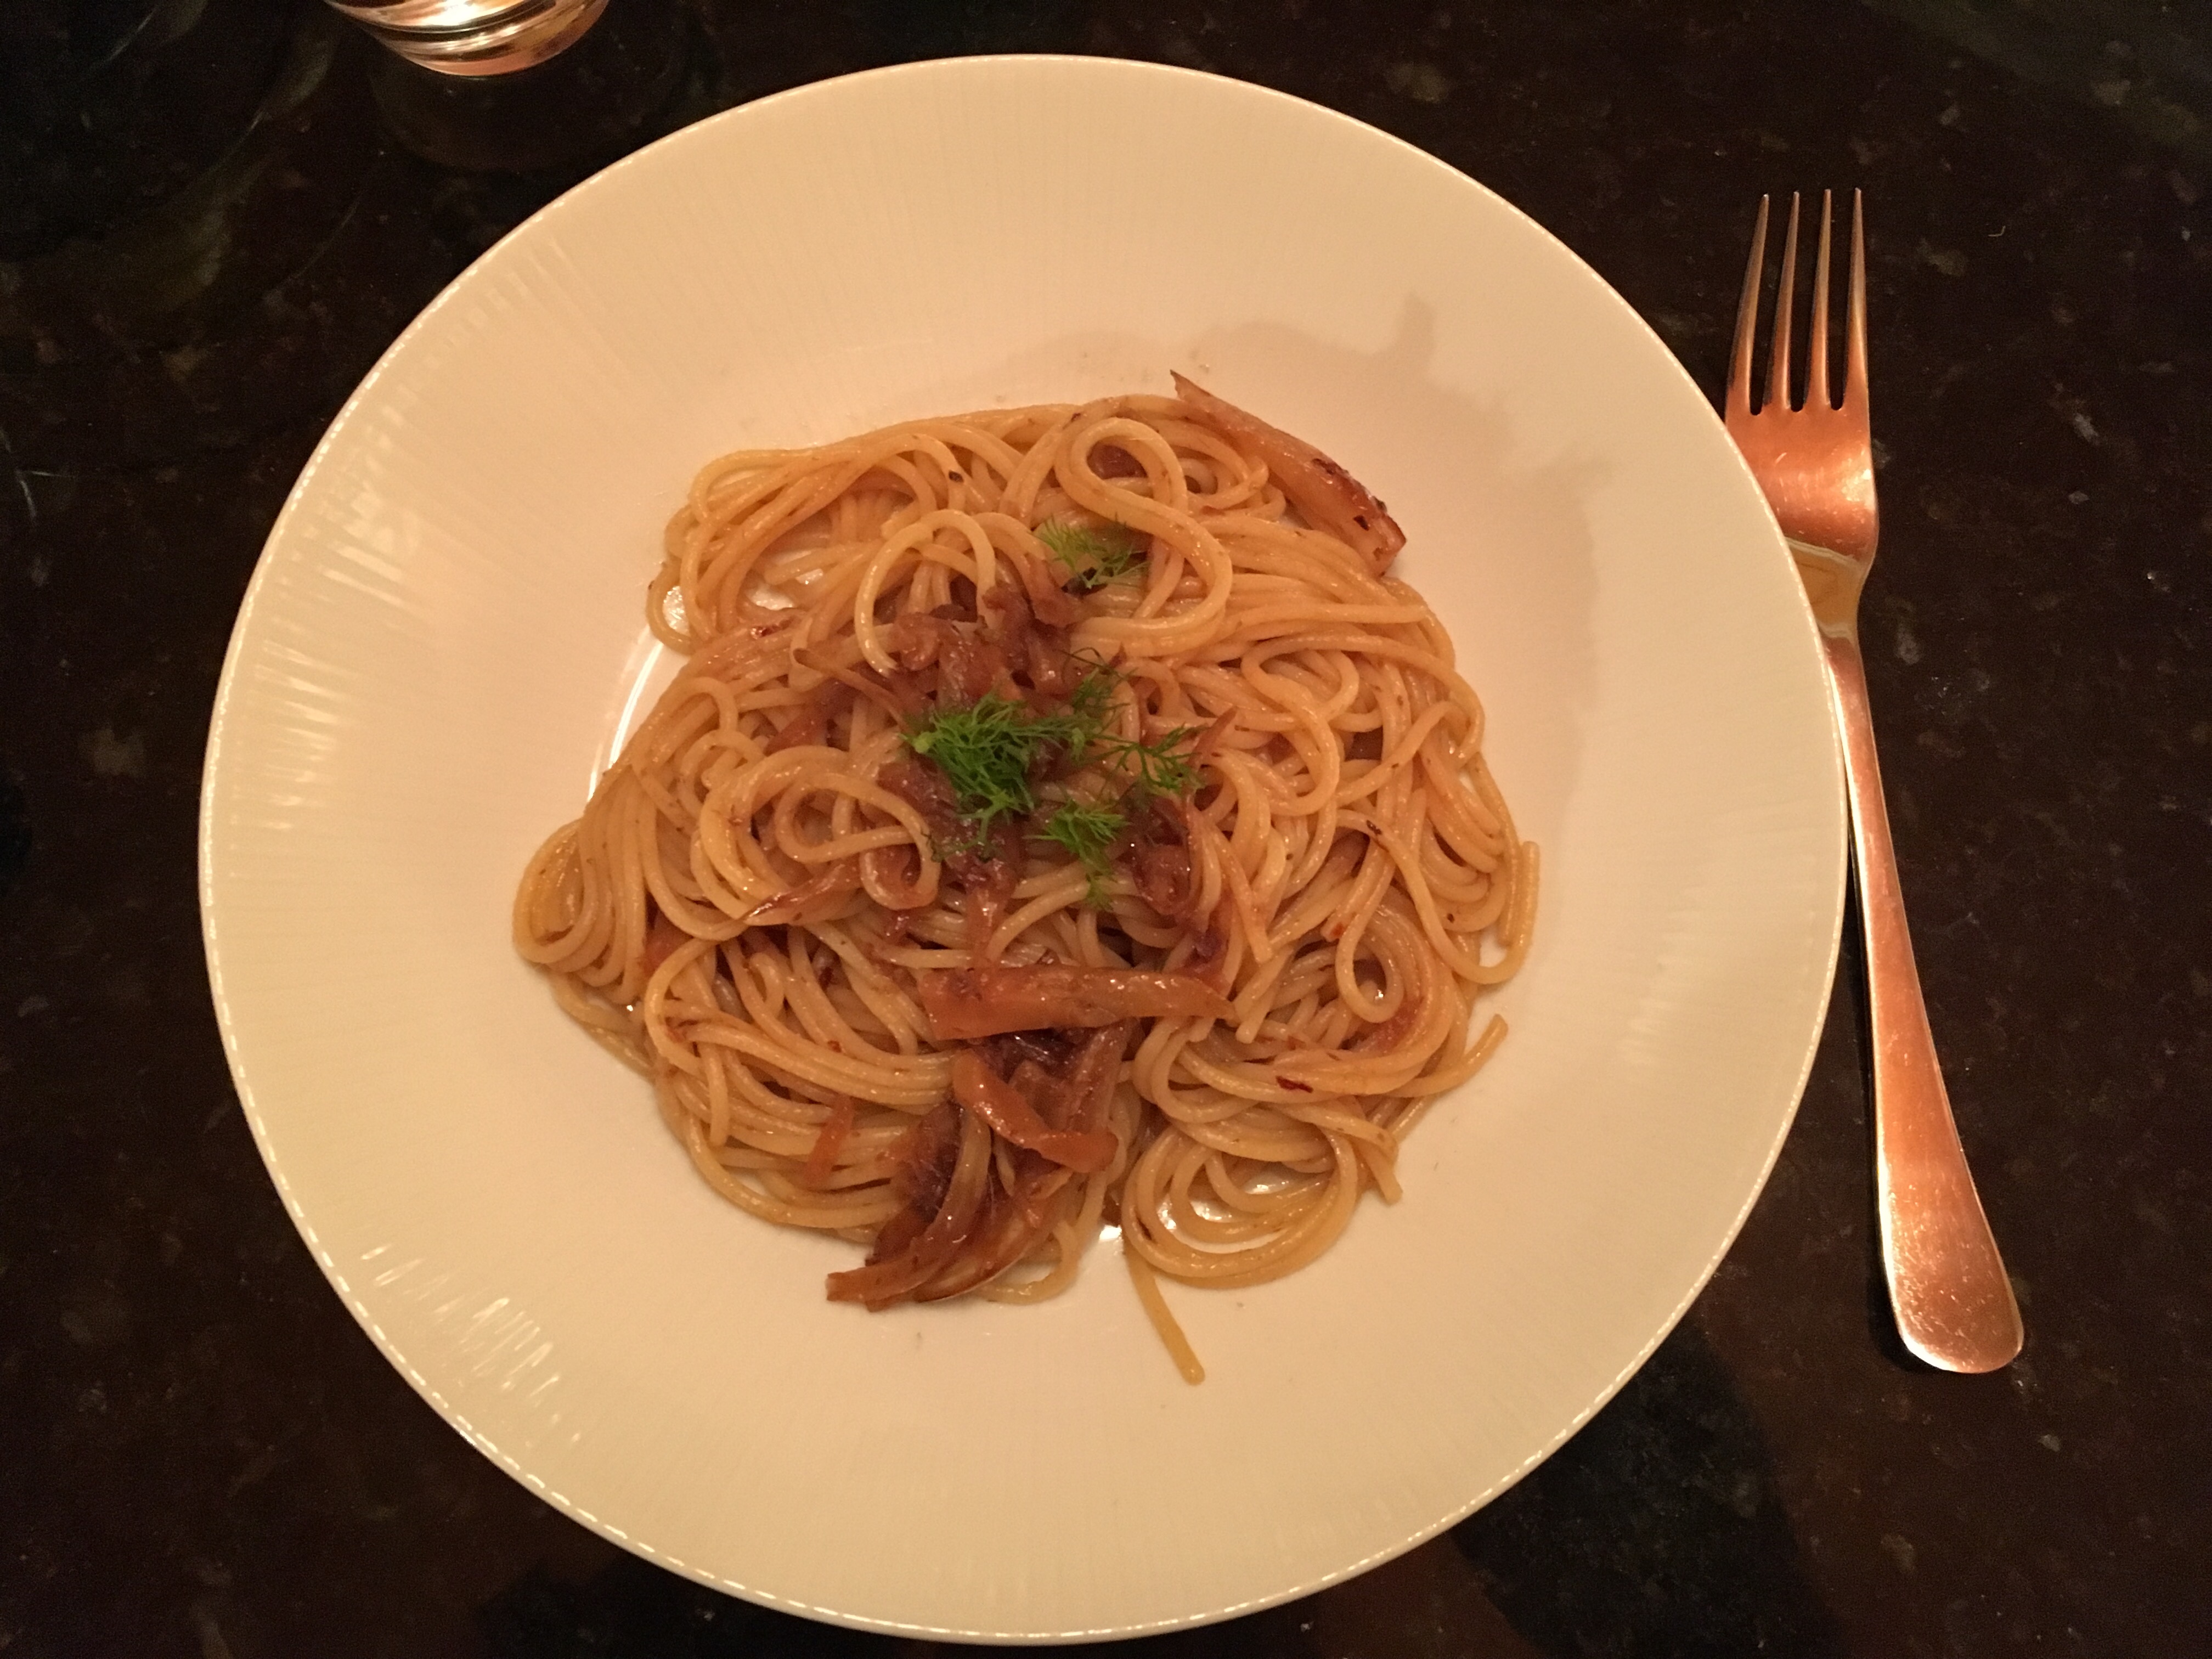
Caramelised fennel, anchovy and chilli spaghetti/linguine

fullsizeoutput_dff

This is an adaptation of a Waitrose recipe which appeared in one of its periodic MyWaitrose members’ mailings.  The original recipe called for sardines but because I don’t care for sardines I decided to modify the recipe.  And in doing so I added some onion, a little stock and changed linguine for spaghetti – only because I didn’t have any linguine to hand when I made this dish the other evening.

Like a number of my recipes this one, too, may be tweaked further.  If you don’t care for anchovies you can swap them or simply leave them out particularly if you wish to make it a vegetarian dish.

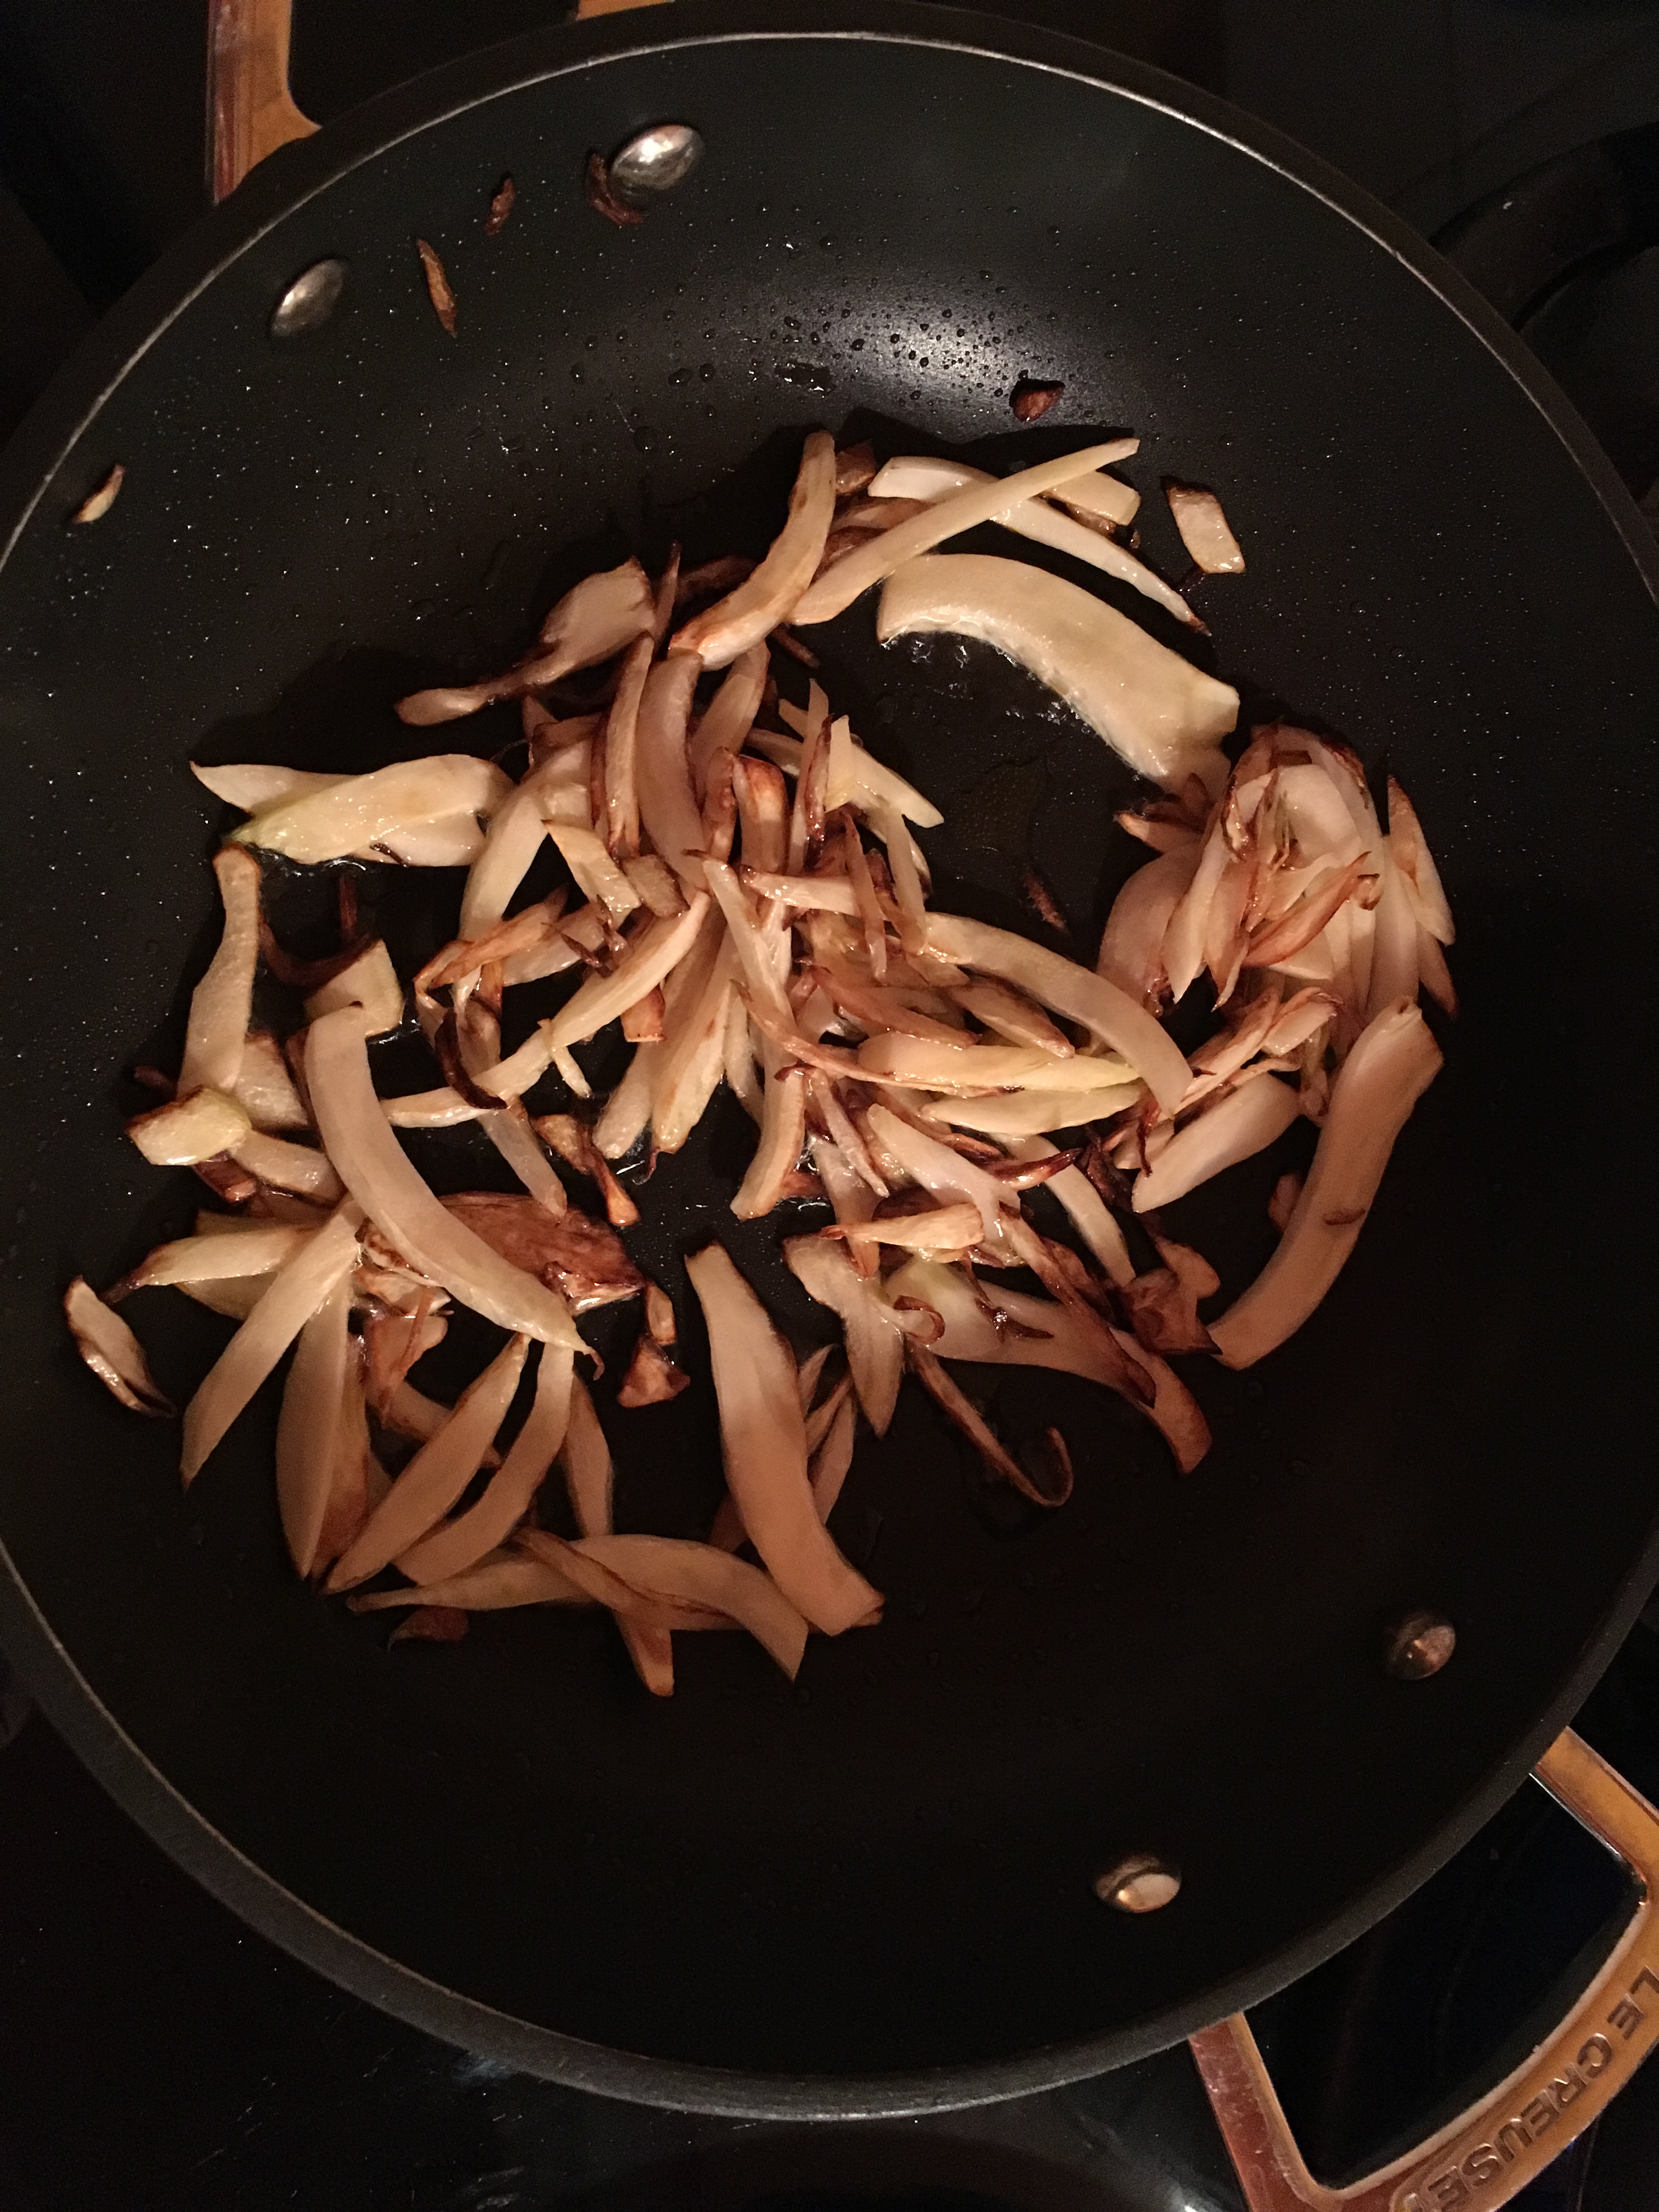
To say the fennel is caramelised is a little bit of a misnomer insofar that no sugar is used but rather the fennel is cooked over a high heat to brown it a little and give a caramel colour to the vegetable.

What you’ll need for two people as a main course or four people for a first course:

  • 200g/7oz (or more depending on appetites) spaghetti or linguine
  • 1 tin anchovies
  • Olive oil
  • 1 fennel bulb finely sliced.  Reserve the fronds
  • Half an onion finely chopped
  • Half a mug of chicken or vegetable stock*
  • Hot chilli flakes
  • Juice of half a lemon

* I use (among other stock cubes and concentrated stock) Knorr’s Touch of Taste liquid stock in bottles.  I find this ideal if you wish to make just a small amount of stock rather than having to make up 500ml of the stuff when using a stock cube.

What you’ll need to do:

  • Put a large saucepan of water to boil for the pasta, salting the water.  Once the water comes to the boil, add your pasta and cook according to the packet instructions or to taste.
  • Whilst the pasta is cooking heat some olive oil in a large frying pan.  You may use the olive oil from the tinned anchovies if you wish – I did a half-and-half, a bit of the anchovy oil and olive oil.
  • Add the fennel and fry over a high heat for 4-6 minutes stirring often until the fennel turns a caramel colour and has softened.  Remove from the frying pan to a dish and keep warm.
  • Reduce the heat and add the chopped onion to the frying pan and fry the onions a little. (Add a little more olive/anchovy oil if you think the pan might need it).   Add the anchovies to the onions and fry gently breaking up the anchovies with a wooden spoon.  They will start to melt into the onion/oil mix.
  • Add the stock and bring to the boil.  A half-mug of stock isn’t too much but what you are aiming for is the stock to reduce to a nice glossy consistency.  Return the fennel to the frying pan and mix together.
  • Drain the cooked pasta and add to the fennel, onion and anchovy sauce (add a little pasta water if you wish), add the chilli flakes and lemon juice and mix all together allowing the sauce to bubble a little and coat the pasta.
  • Serve topped with the reserved fennel fronds.

IMG_1599
Frying the fennel until caramel coloured

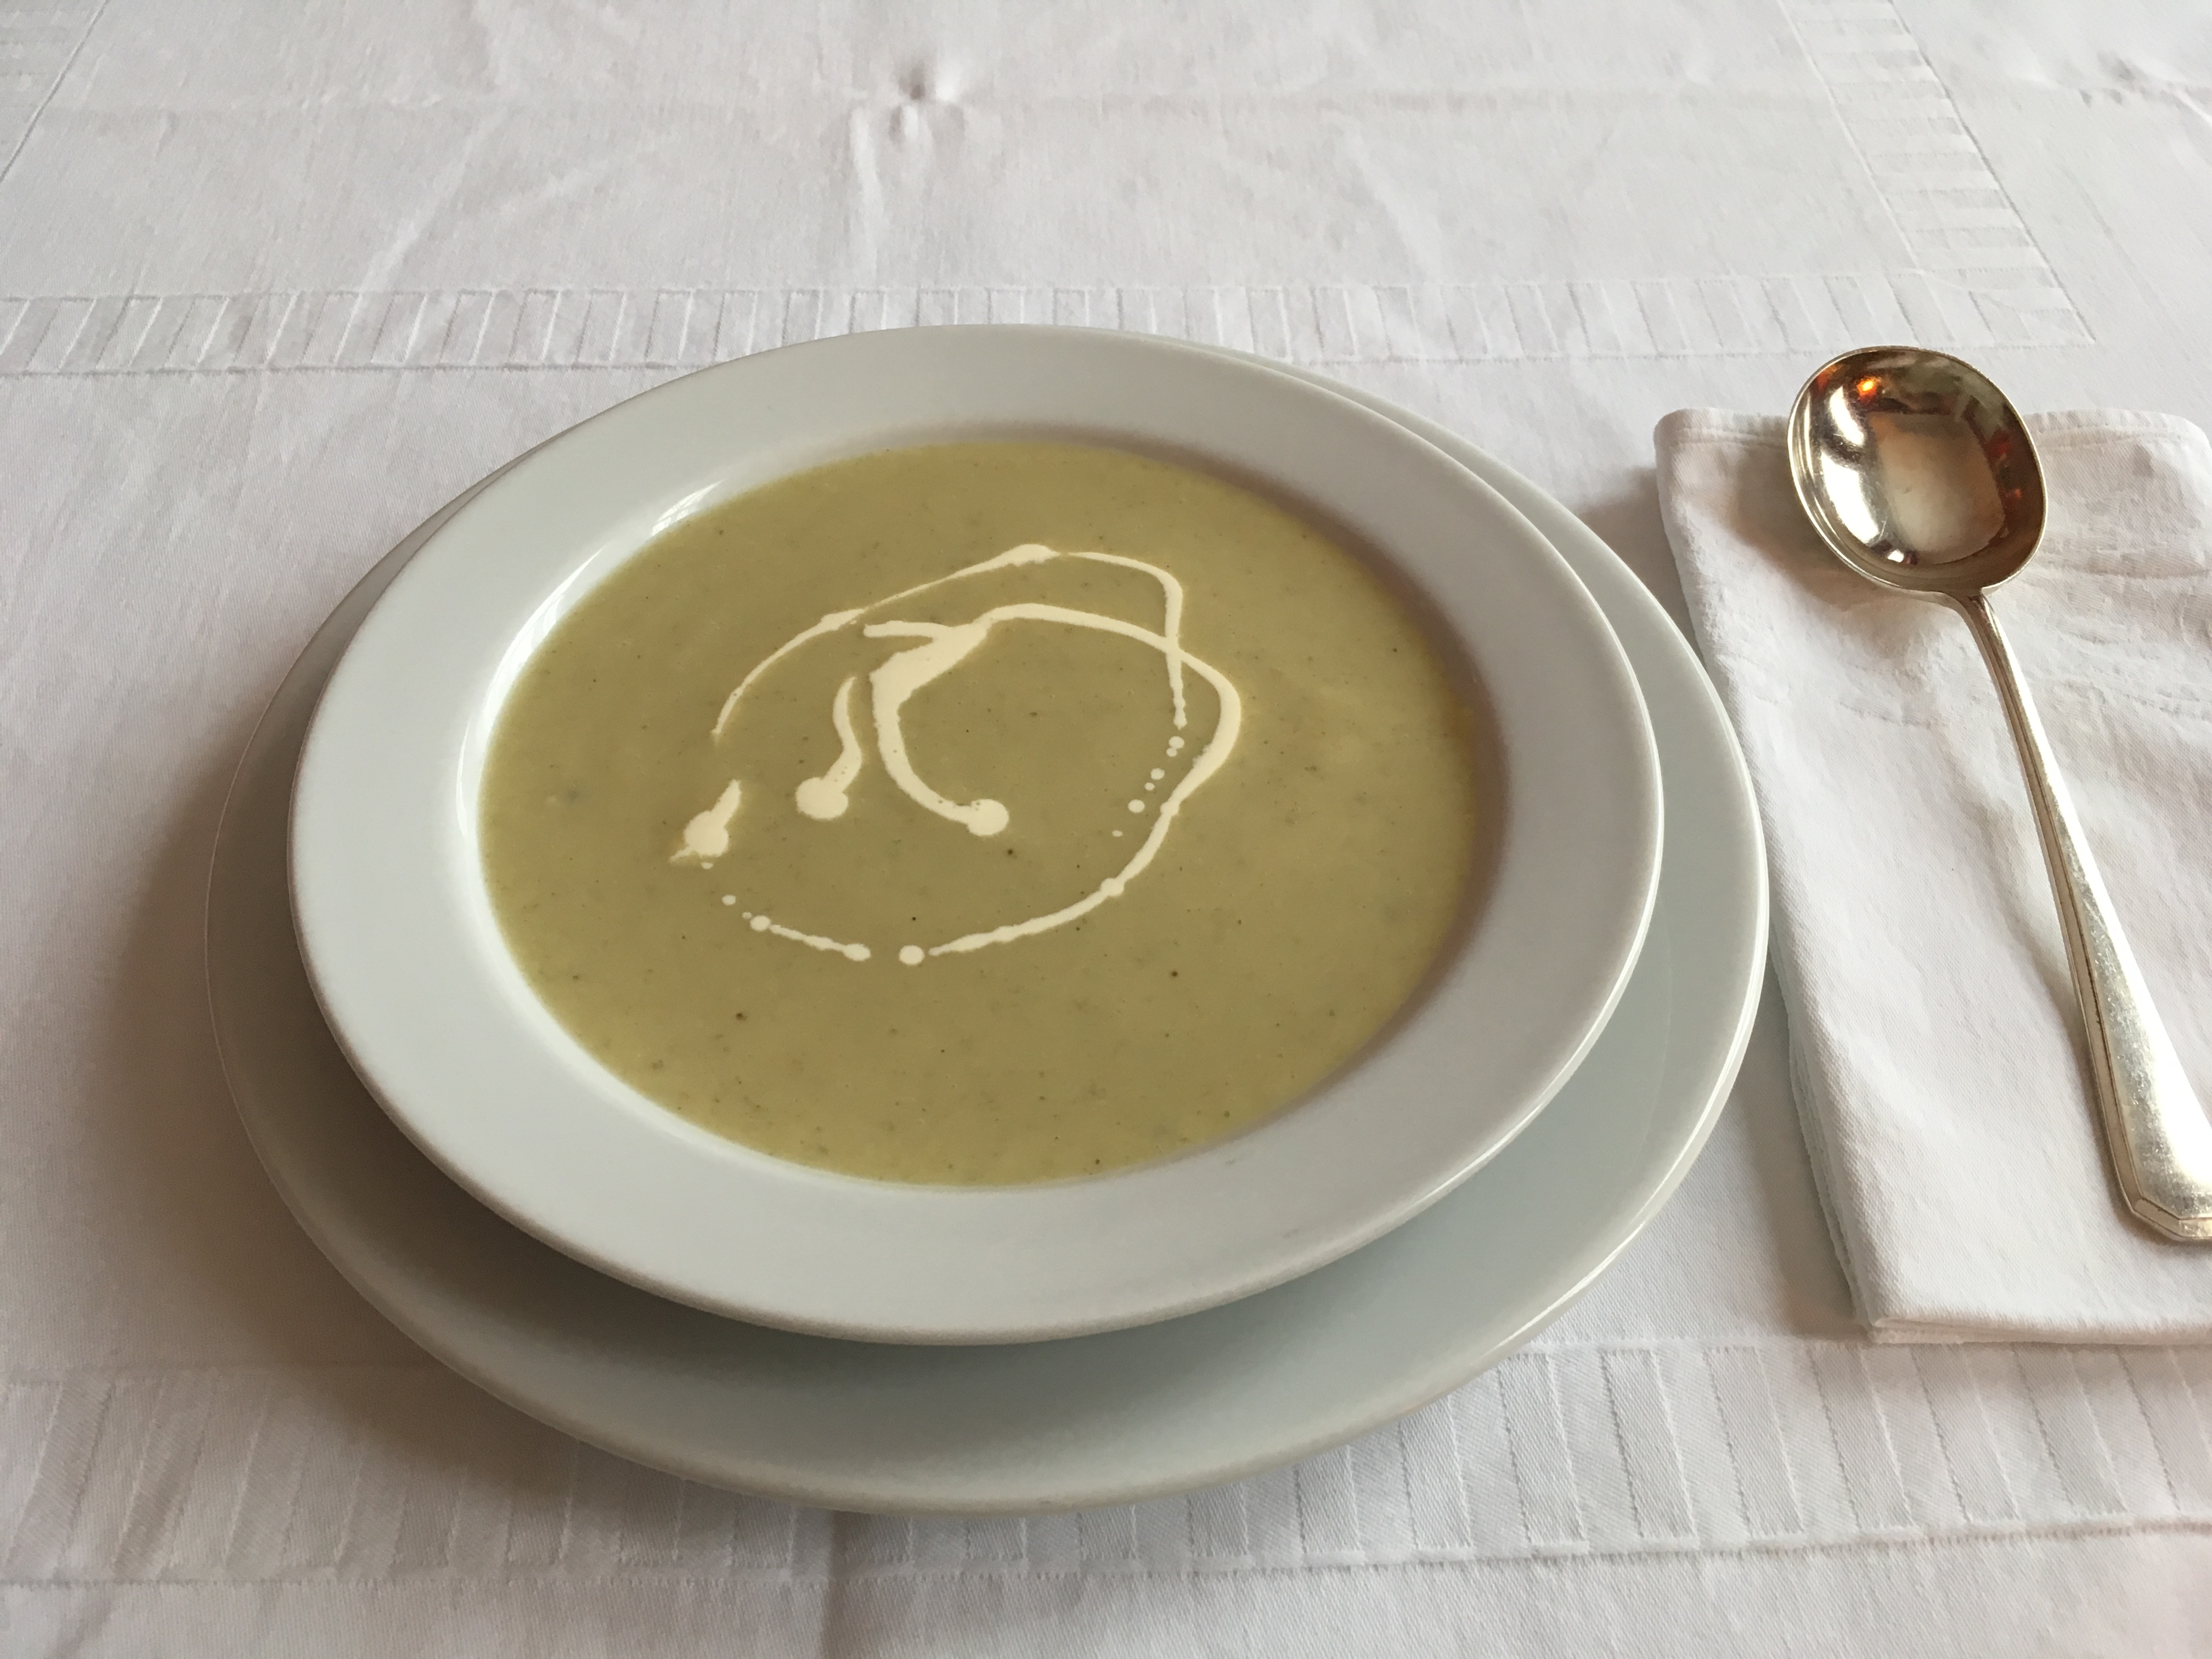
Cream of celeriac soup

IMG_1529

I made this soup after I returned home from spending a weekend with my friends Annie and Andrew at their home in Wiltshire.  On the Saturday Annie and Andrew took me to Salisbury where there is a very good market in the main square – a proper market with vegetable stalls, fruit sellers, butchers, a cheesemonger (maybe two) and all manner of stalls with delicious foods to buy.  One of my purchases was the celeriac – the other was a brace of pheasant which were locally sourced (and shot) and are now residing in my freezer – the subject of a future post.  I must say that the Salisbury saturday market is reason enough to move there.

What you’ll need for four people as a soup/first course:

  • One celeriac approximately 1kg in weight
  • One medium-sized onion peeled and cut in half
  • One small to medium-sized potato peeled and cut in half or quarters*
  • 1.5 litres vegetable stock
  • Salt and pepper
  • Cream**

What you’ll need to do:

  • Prepare the celeriac by trimming off the thick knobbly roots.  Then, either using a potato peeler or a sharp knife, ‘skin’ the celeriac.  If you are using a knife be careful not to take off chunks of the vegetable with the skin.  The skin is easy to trim away so not much force is needed.
  • Cut celeriac into chunks
  • Make up the vegetable stock in a large saucepan and bring to the boil.
  • Add the celeriac, onion and potato to the stock and reduce to a simmer.  Cover with saucepan lid and simmer for 25 to 30 minutes.
  • Check that the celeriac and potato are cooked and if so turn off the heat and allow the mixture to cool.
  • Once the broth and vegetables are cooled sufficiently transfer to a liquidiser and whizz until smooth.
  • Return soup to a clean saucepan and season with salt and a little pepper if you wish.  Remember,  the stock will have salt in it so you may not need to add more.
  • As you are warming the soup prior to serving pour in the cream a little at a time to your liking.  Once you have added the cream don’t let the soup boil as the cream may separate.

* I include a potato because it acts as a natural thickening agent.  If you prefer a thinner soup then you may either omit the potato altogether or add more stock after you have blended the soup.  I think the potato adds a little silkiness to the overall texture.

** If you wish to keep the calories down then you can ditch the cream – the soup will be just as delicious without it.  Oh yes, I use double cream myself.

As a post-script I would like to thank my friend June Lim of Singapore who suggested  I should put the picture of the finished dish at the top of the recipe and not at the bottom.

Bulldogs

fullsizeoutput_dceWhen my sisters and I were children we would  visit our two aunts in Chester, Olwen and Morfydd.  Aunty Morfydd was a very good cook and she would often prepare bulldogs for us.  I don’t know why this sandwich got given the name of bulldog (perhaps my sisters know – I never thought to ask them) but it was Morfydd’s creation.
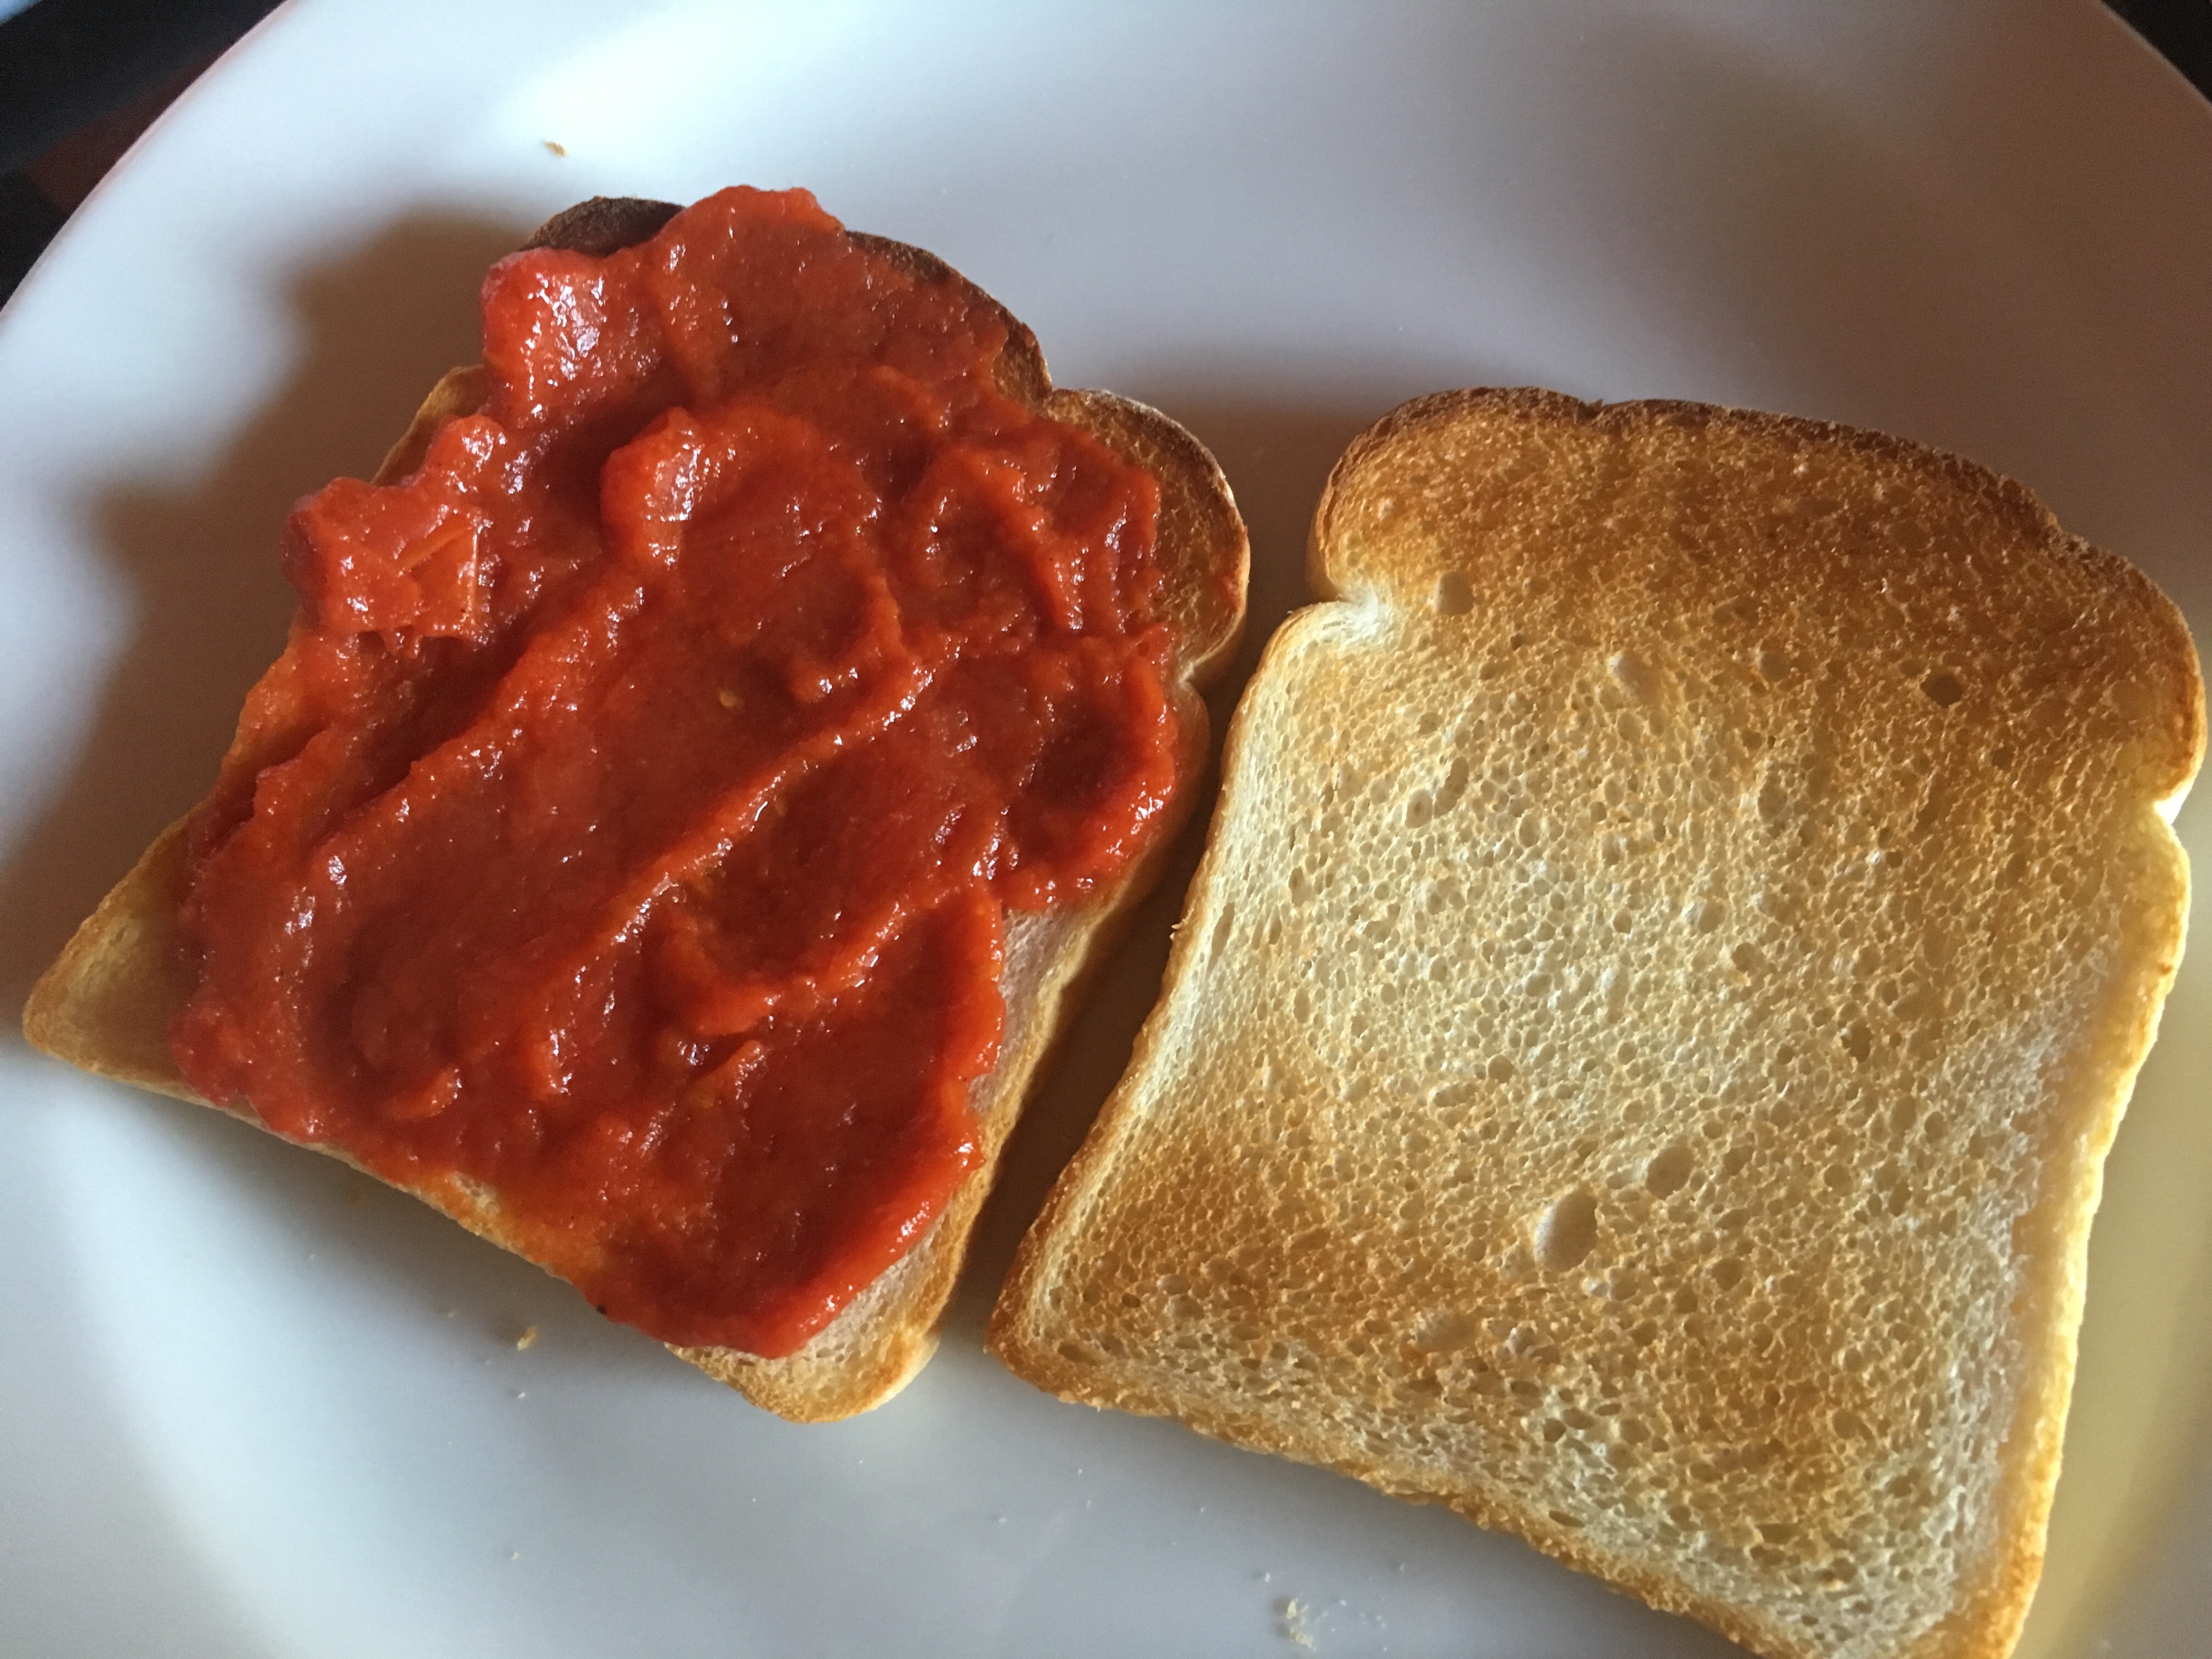
As we would visit in the afternoon it formed part of a high tea (not to be confused with afternoon tea) and our mother would make them for us for breakfast at home too.

It is, simply put, a toasted tomato sandwich however instead of buttering the inside the top piece of toast is buttered.  Though this recipe is ever so easy to make my sisters, particularly Caroline, often ask me to make bulldogs for them – so too my niece Natalie.

What you’ll need for two to three people is:

  • Olive oil
  • One 400g tin of tomatoes
  • Salt and pepper
  • 6-8 slices of white bread (white is best in my opinion)
  • Butter

What you’ll need to do:

  • Heat a good slug of olive oil in a saucepan.
  • When the oil has warmed up a bit put in the tomatoes.  If you are using whole plum tomatoes break them up a bit with a wooden spoon.
  • Cook the tomatoes over a medium to high heat for about 15 to 20 minutes.  The idea is to cook the tomatoes to a nice pulp.   But be warned – do not walk away and leave the tomatoes to their own devices because they will catch and burn.  Keep an eye on them and stir regularly.  You have arrived at the right consistency once the juice has evaporated and the resulting tomato sauce is glossy.
  • Season with salt and pepper to taste.

Once the tomatoes are cooked you can set them aside and keep the pan warm (on a hot plate if you have one) with lid on the saucepan whilst you make the toast.

Once you have your toast nice and golden remove from the toaster or grill and on one piece of toast spread a thin layer of tomato.  Then place the second piece of toast on top and butter the top piece.

fullsizeoutput_ddd

Slice in half and enjoy you bulldogs!

fullsizeoutput_dce

Postscript:

Cooking the tomatoes as described above also forms a basic tomato sauce for pasta.  In fact if you look back at my Arrabbiata and Amatriciana recipes this the basic sauce.

Oh yes, if you have more people to feed, simply add more tins of tomatoes and have more slice of bread to hand.  If you have left-over tomato sauce simply keep it in the fridge and use in the next days to make a pasta sauce of you choice.